
Insights from recent episode analysis
Audience Interest
Podcast Focus
Publishing Consistency
Platform Reach
Insights are generated by CastFox AI using publicly available data, episode content, and proprietary models.
Most discussed topics
Brands & references
Total monthly reach
Estimated from 8 chart positions in 8 markets.
By chart position
- 🇺🇸US · Home & Garden#5230K to 100K
- 🇨🇦CA · Home & Garden#1135K to 30K
- 🇸🇪SE · Home & Garden#1061K to 10K
- 🇳🇱NL · Home & Garden#1541K to 10K
- 🇿🇦ZA · Home & Garden#2510K to 30K
- Per-Episode Audience
Est. listeners per new episode within ~30 days
15K to 59K🎙 Daily cadence·172 episodes·Last published 5d ago - Monthly Reach
Unique listeners across all episodes (30 days)
51K to 196K🇺🇸51%🇨🇦15%🇿🇦15%+5 more - Active Followers
Loyal subscribers who consistently listen
20K to 78K
Market Insights
Platform Distribution
Reach across major podcast platforms, updated hourly
Total Followers
—
Total Plays
—
Total Reviews
—
* Data sourced directly from platform APIs and aggregated hourly across all major podcast directories.
On the show
From 17 epsHost
Recent guests
Recent episodes
Controlling Starthistle, Summer's Most Evil Weed*
Jun 19, 2026
34m 01s
Your Garden vs. Summer Heatwaves
Jun 12, 2026
23m 13s
Other Vegetables That Love the Heat
Jun 5, 2026
10m 30s
A Deep Dive Into Citrus Containers
May 29, 2026
48m 52s
Your 7 Favorite Beyond the Garden Basics Newsletter Editions
May 22, 2026
15m 31s
Social Links & Contact
Official channels & resources
Official Website
Login
RSS Feed
Login
| Date | Episode | Topics | Guests | Brands | Places | Keywords | Sponsor | Length | |
|---|---|---|---|---|---|---|---|---|---|
| 6/19/26 | 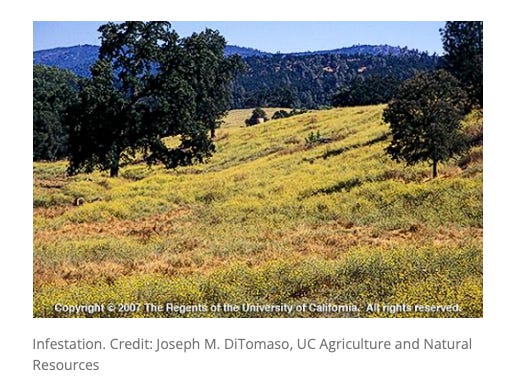 Controlling Starthistle, Summer's Most Evil Weed* | Today’s newsletter is all about starthistle, and all the ways you can control this summer weed…organically. If you want to read about chemical controls for starthistle, check out this University of California Ag and Natural Resources publication, “Yellow Starthistle”.In today’s podcast (above), America’s Favorite Retired College Horticulture Professor and I talk about the chemical side of weed control products, including all the different formulations of Roundup that are on the market, but they all have very different tasks; some can even sterilize your soil, making your garden unavailable for weeks, months, - or according to Flower - years. We offer tips for using herbicides, as well. We mention a University of Tennessee Institute of Agriculture publication about the different Roundup formulations entitled, “UPDATE ON ROUNDUP-BRANDED HERBICIDES FOR CONSUMERS” that can help you decide.One national database for insecticide/herbicide/miticide labels is the U.S. Environmental Protection Agency’s webpage, “Pesticide Product and Label System.” It’s not the easiest site to navigate, but be persistent. This is a public episode. If you'd like to discuss this with other subscribers or get access to bonus episodes, visit gardenbasics.substack.com/subscribe | 34m 01s | ||||||
| 6/12/26 | 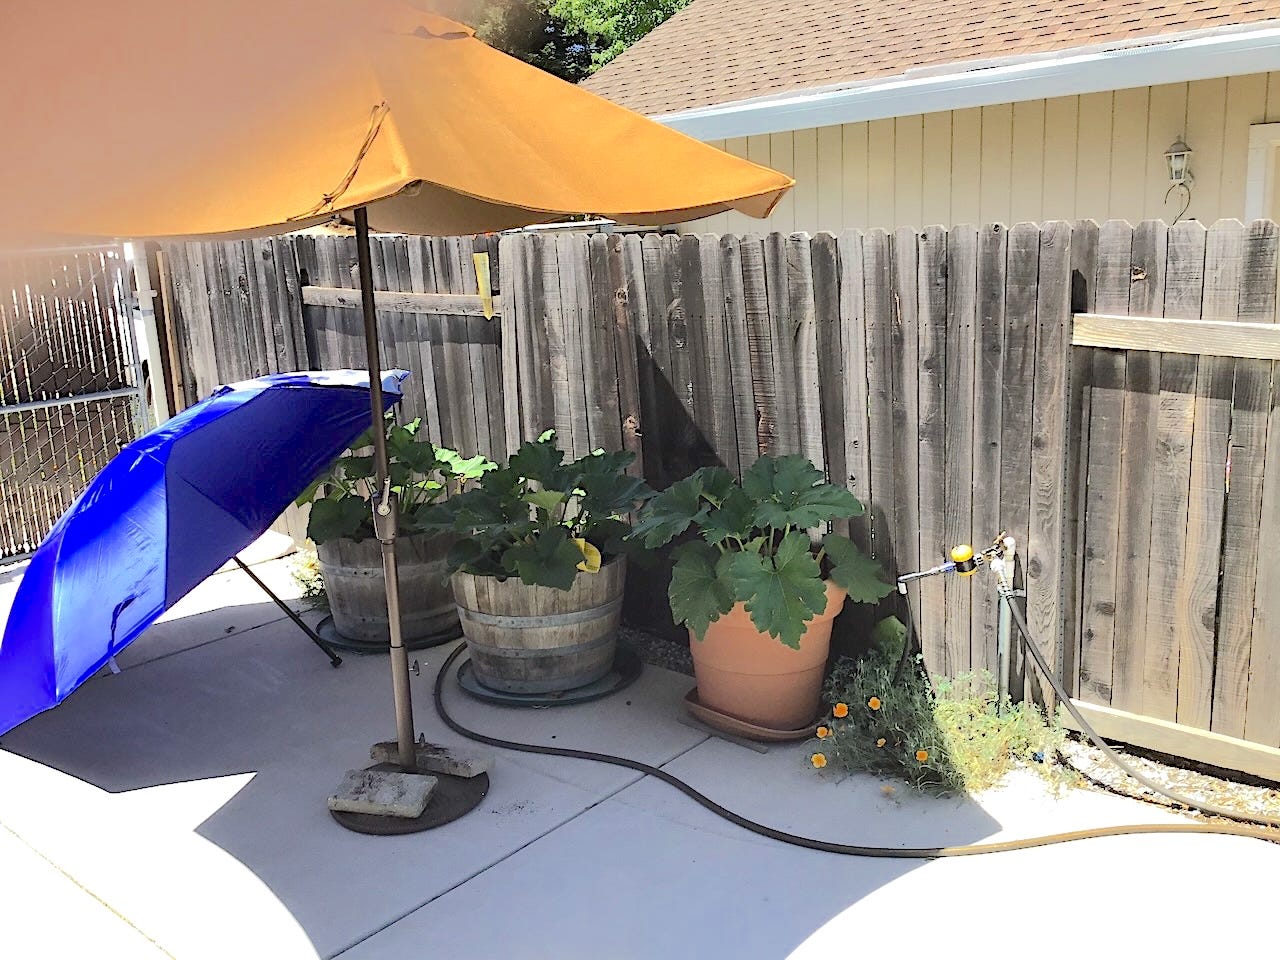 Your Garden vs. Summer Heatwaves✨ | garden careheatwave management+3 | Debbie FlowerGail Pothour | Sacramento County Master Gardener | — | summer heatwavesgarden care+3 | — | 23m 13s | |
| 6/5/26 | 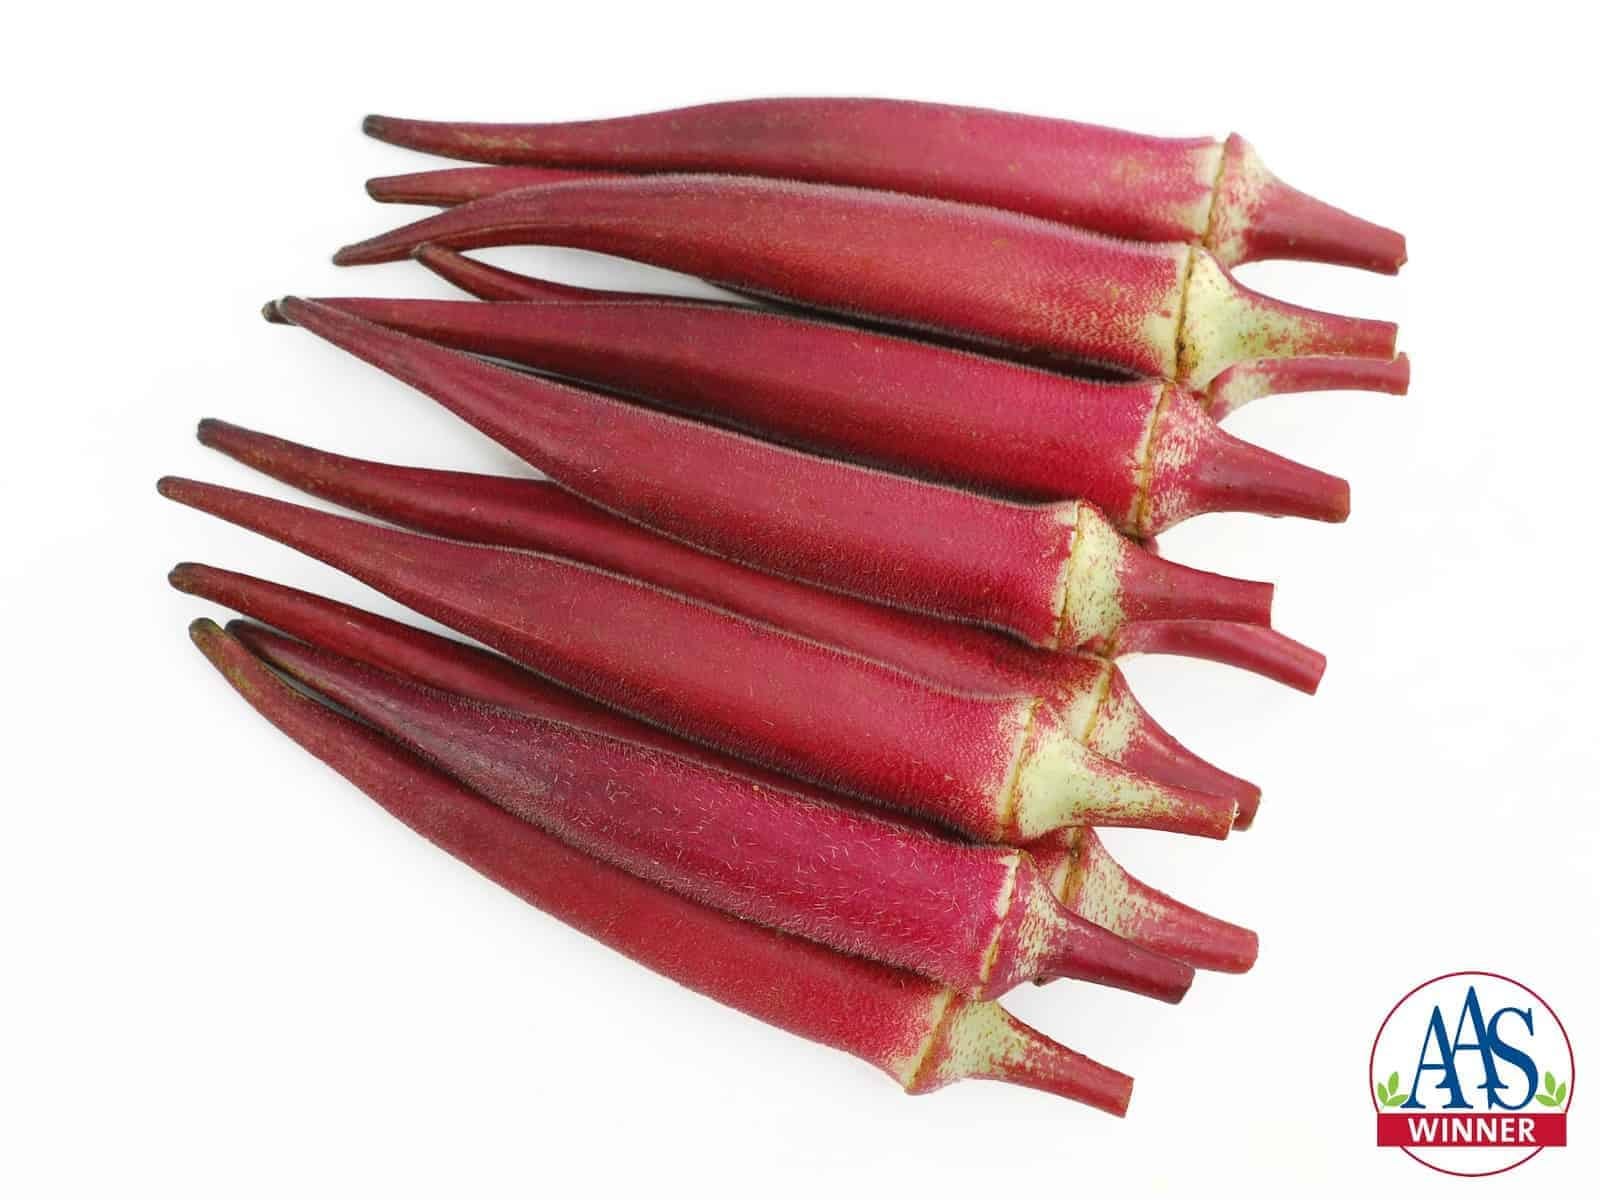 Other Vegetables That Love the Heat✨ | vegetable gardeningokra cultivation+3 | Gail Pothour | okramelons+3 | Sacramento CountySouth Carolina | okravegetable gardening+3 | — | 10m 30s | |
| 5/29/26 | 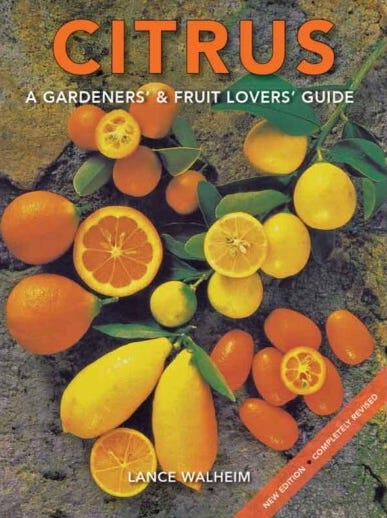 A Deep Dive Into Citrus Containers✨ | citrus treescontainer gardening+4 | Lance Walheim | Citrus: A Gardeners’ & Fruit Lovers’ Guide | — | citruscontainers+5 | — | 48m 52s | |
| 5/22/26 | 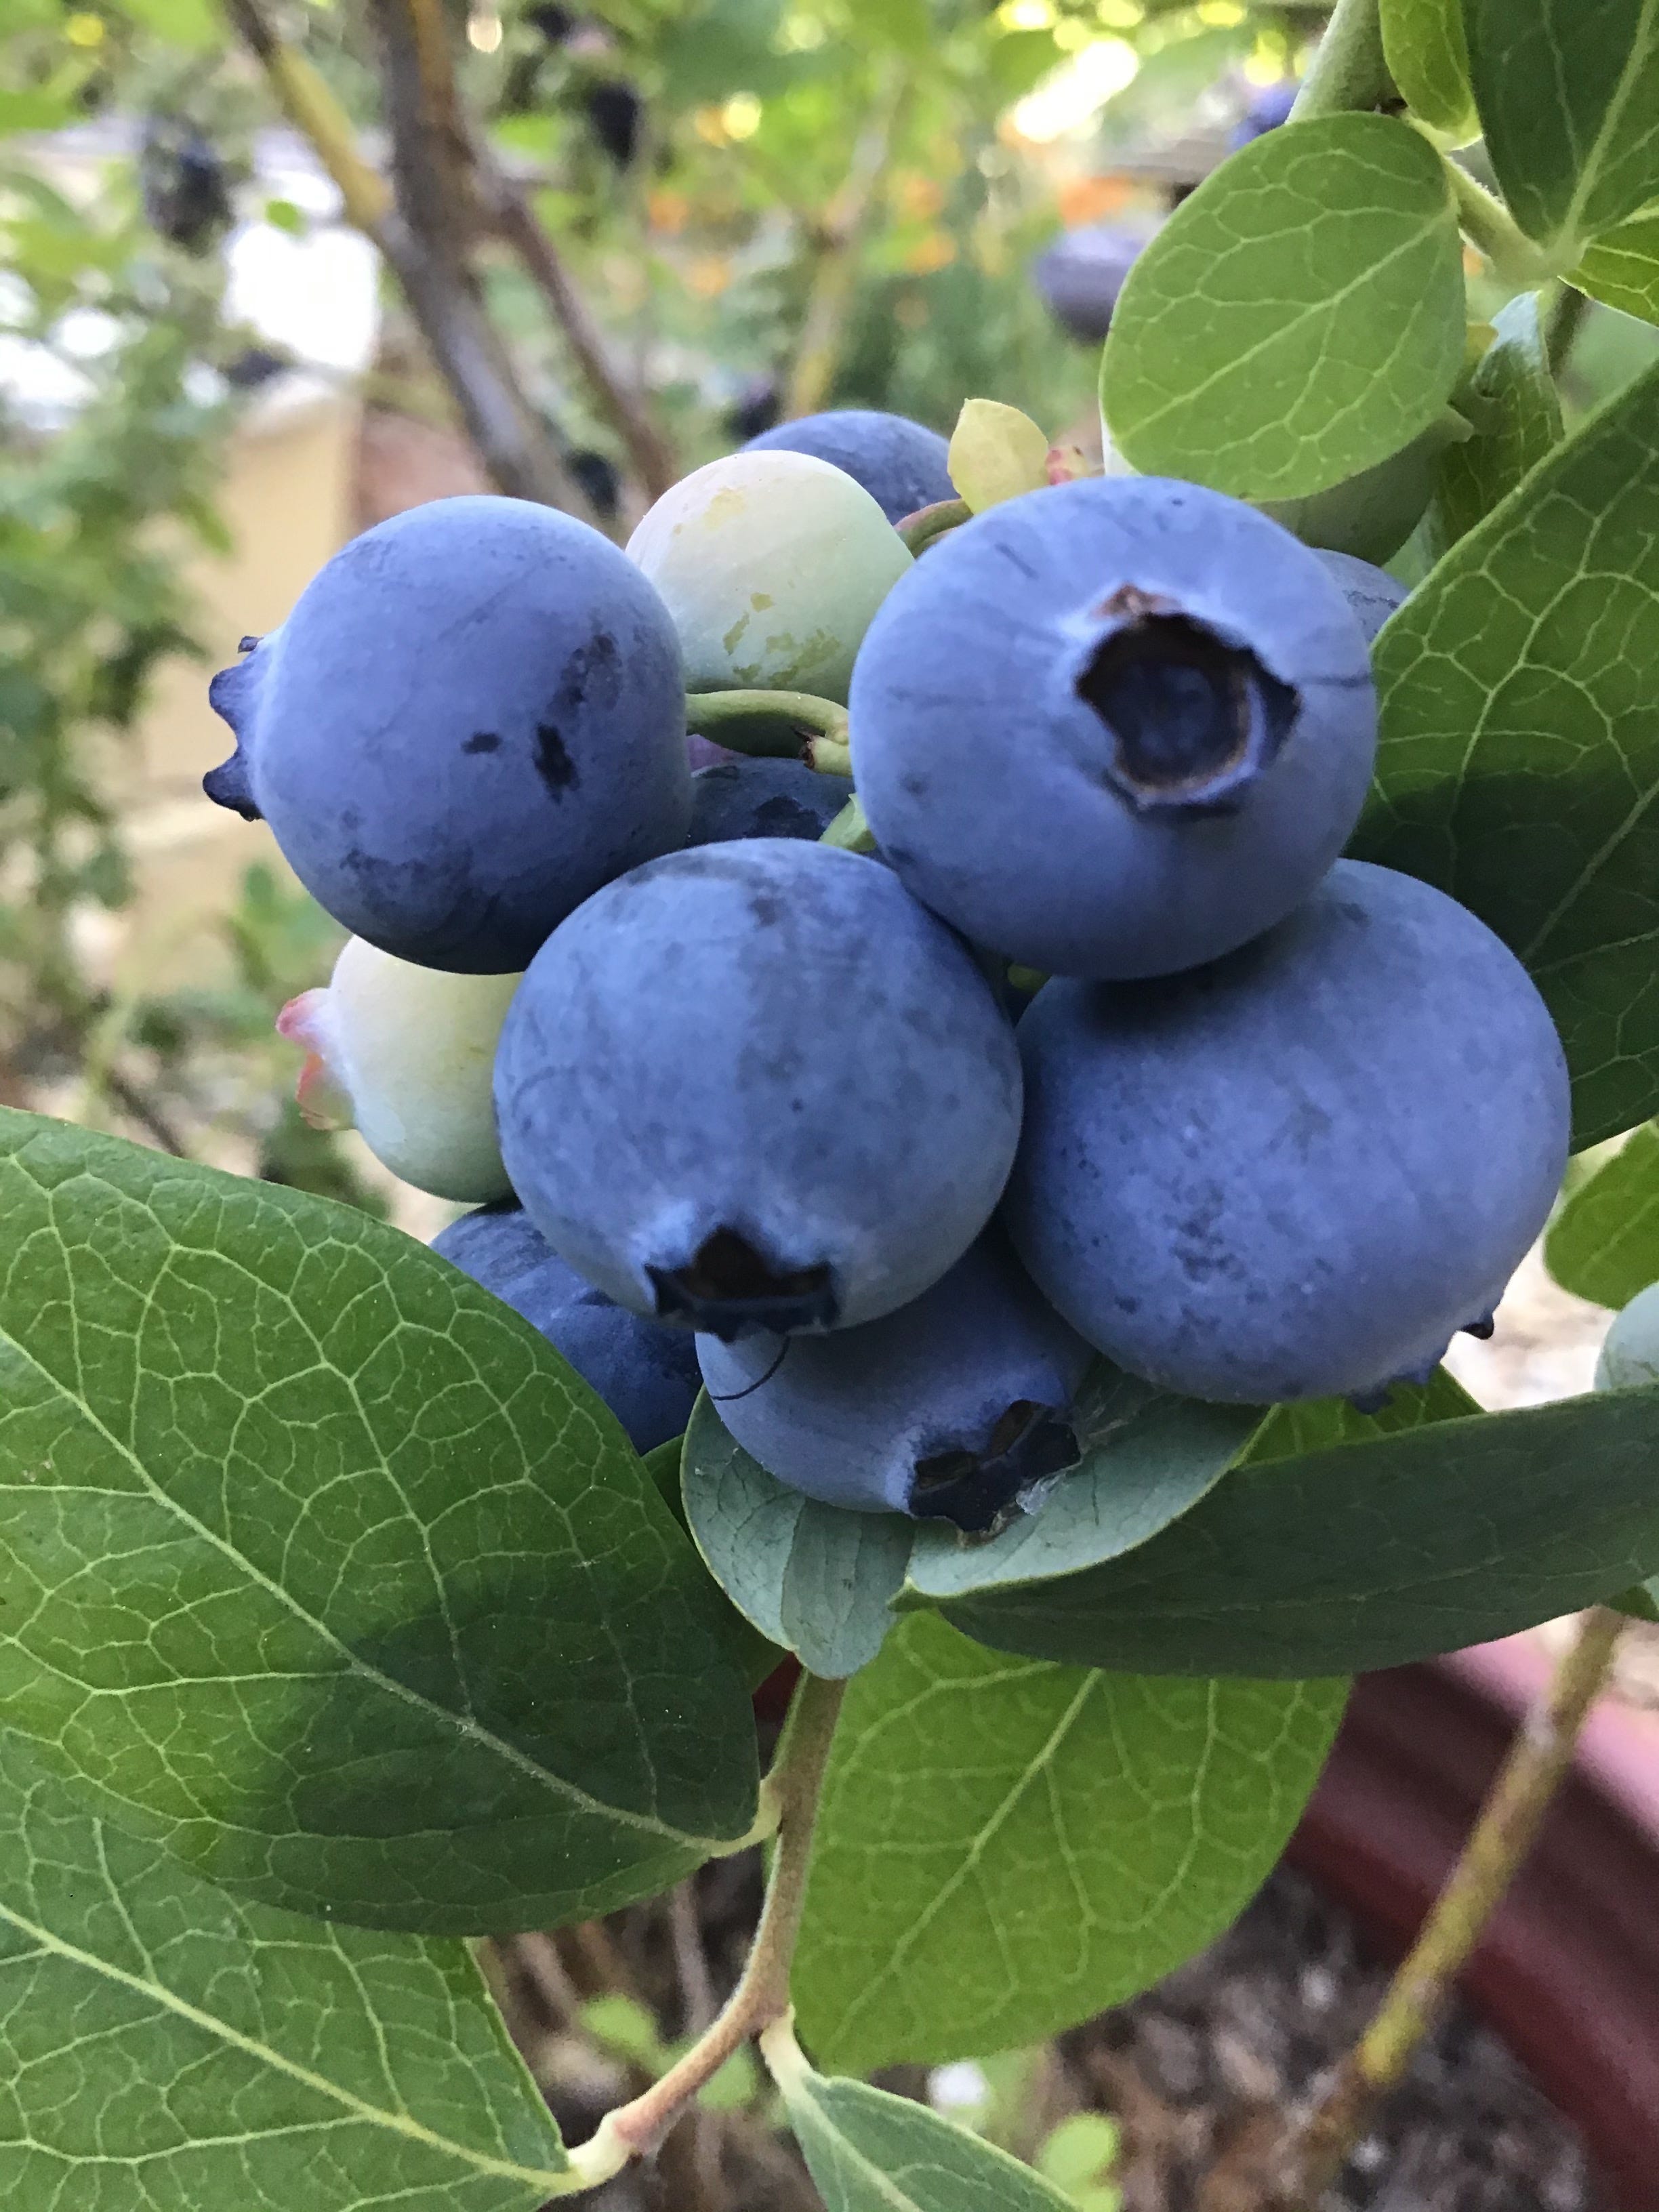 Your 7 Favorite Beyond the Garden Basics Newsletter Editions✨ | gardeningnewsletters+3 | — | Beyond the Garden Basics | — | gardening infonewsletter editions+3 | — | 15m 31s | |
| 5/15/26 | 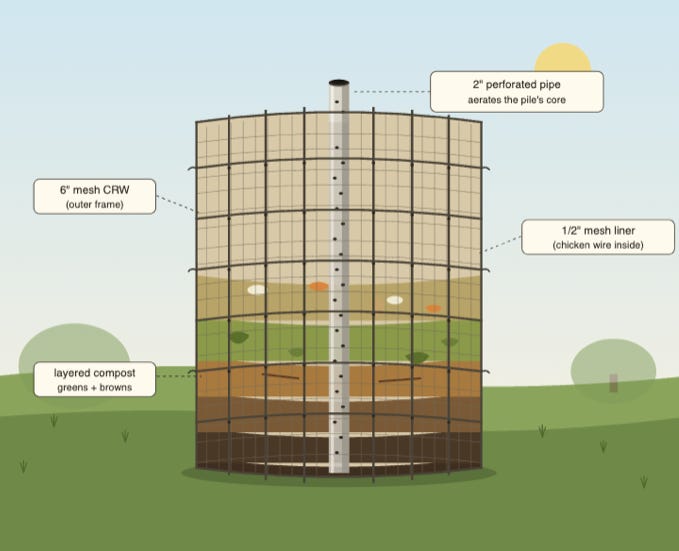 The No-Turn, Easy Compost Pile✨ | compostinggardening+3 | — | UC Master Gardeners of Alameda CountyUCANR | — | compostsoil structure+5 | — | 15m 37s | |
| 5/8/26 | 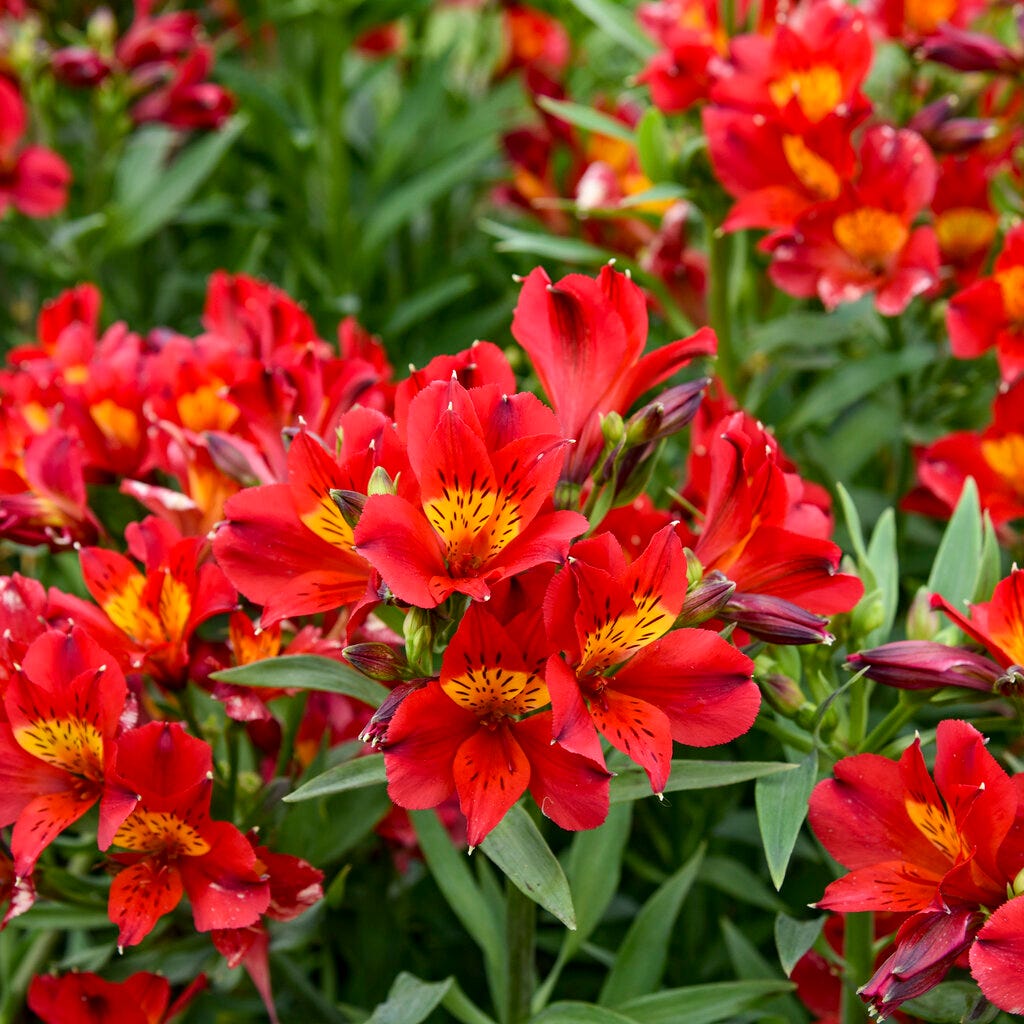 Is This the Longest Lasting Cut Flower? Perhaps. But, Beware.✨ | cut flowersalstroemeria+3 | — | alstroemeriaPeruvian Lily+3 | — | alstroemeriacut flower+3 | — | 8m 11s | |
| 5/5/26 | 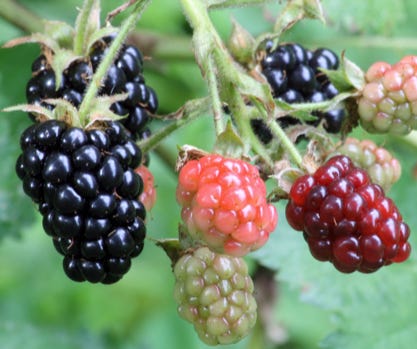 Tips For Growing Blackberries✨ | blackberriessuperfoods+3 | Jeff Smoker | North Carolina State University | CaliforniaUnited States | blackberriessuperfood+5 | — | 49m 33s | |
| 5/1/26 | 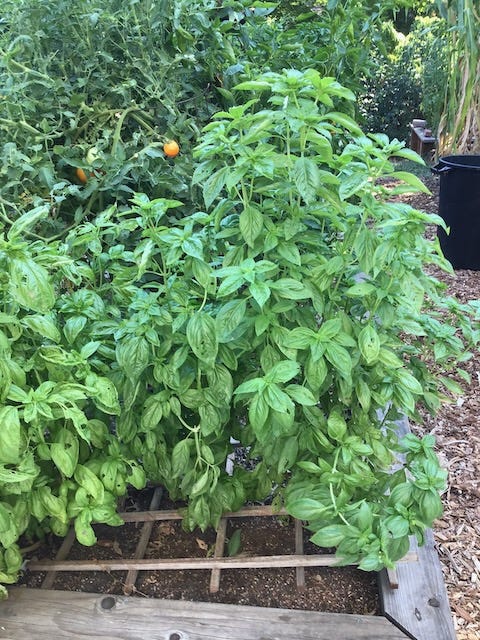 All About Basil✨ | basil cultivationhome gardening+3 | Rose Loveall-Sale | Morningsun Herb Farm | VacavilleSan Francisco Bay Area | basilcultivation+5 | — | 31m 39s | |
| 4/24/26 | 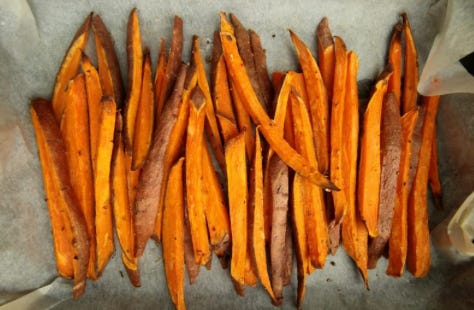 Growing Sweet Potatoes✨ | sweet potatoesgardening+3 | Gail Pothour | — | San Joaquin CountyCalifornia+2 | sweet potatoesgrowing tips+3 | — | 16m 13s | |
Want analysis for the episodes below?Free for Pro Submit a request, we'll have your selected episodes analyzed within an hour. Free, at no cost to you, for Pro users. | |||||||||
| 4/17/26 | 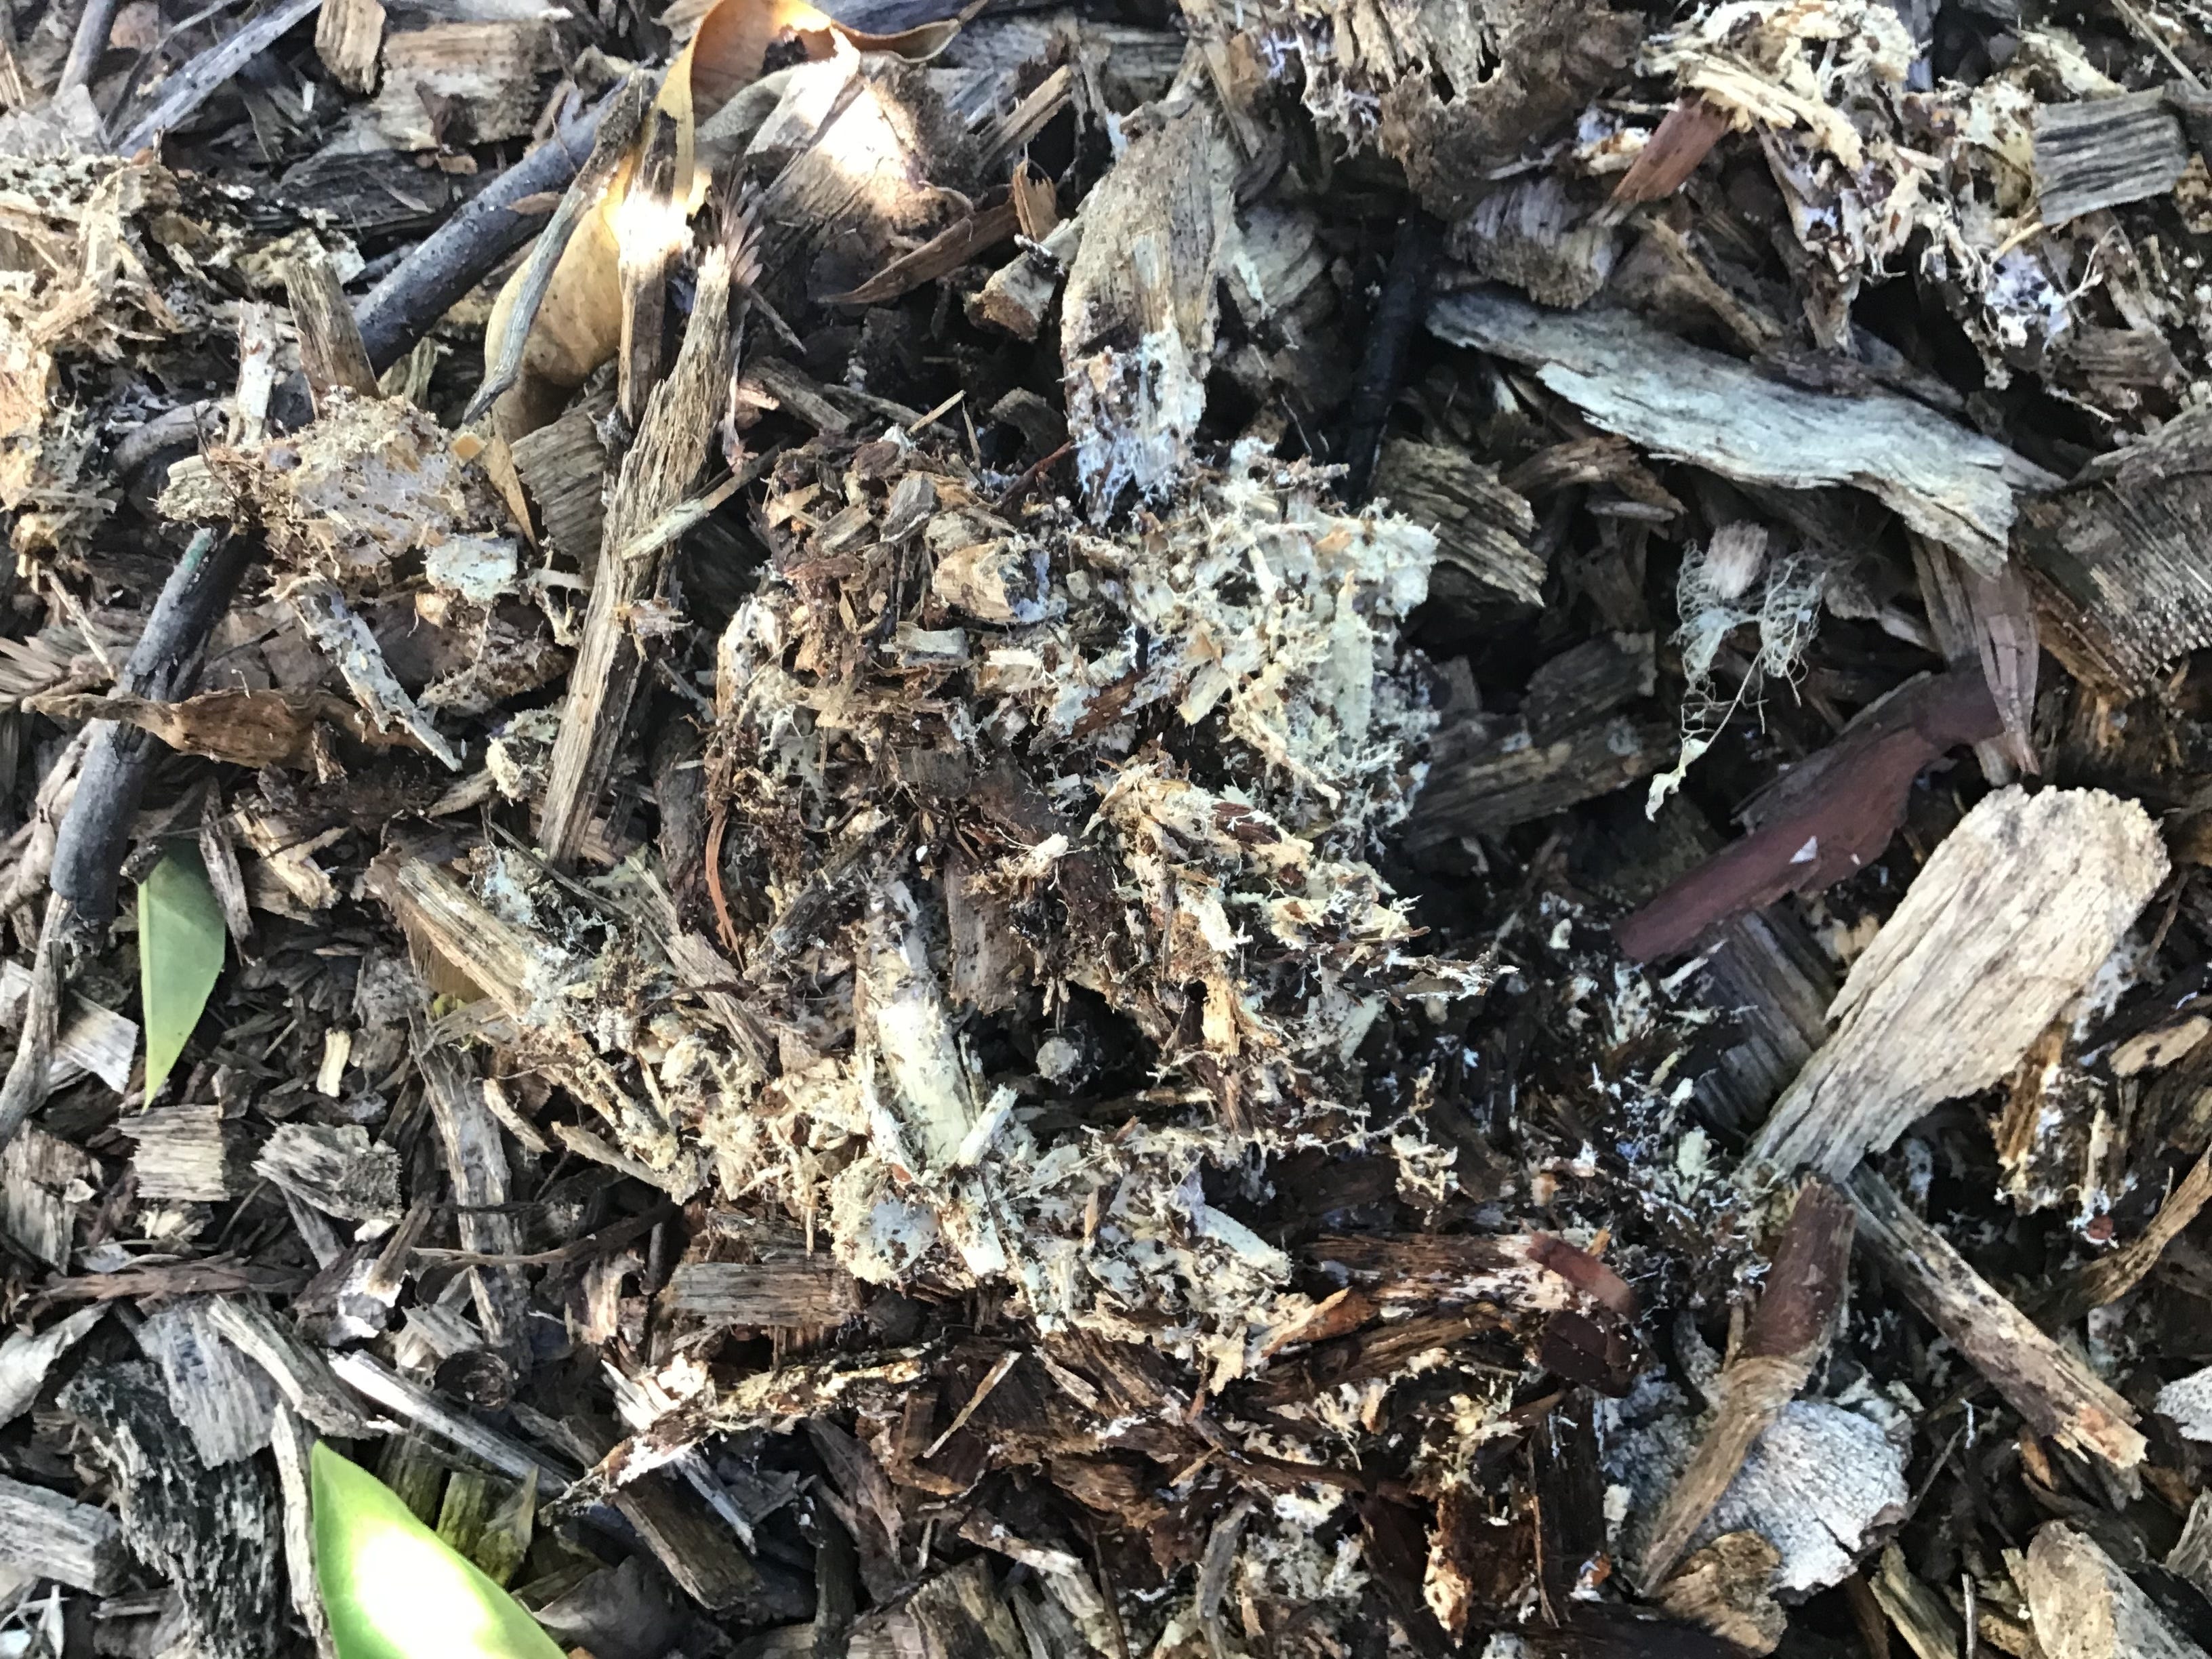 Mycorrhizal Activity and Your Plants' Health✨ | mycorrhizal activityplant health+3 | — | Avatar | — | mycorrhizaearbuscular mycorrhizal fungi+3 | — | 1h 23m 26s | |
| 4/14/26 | 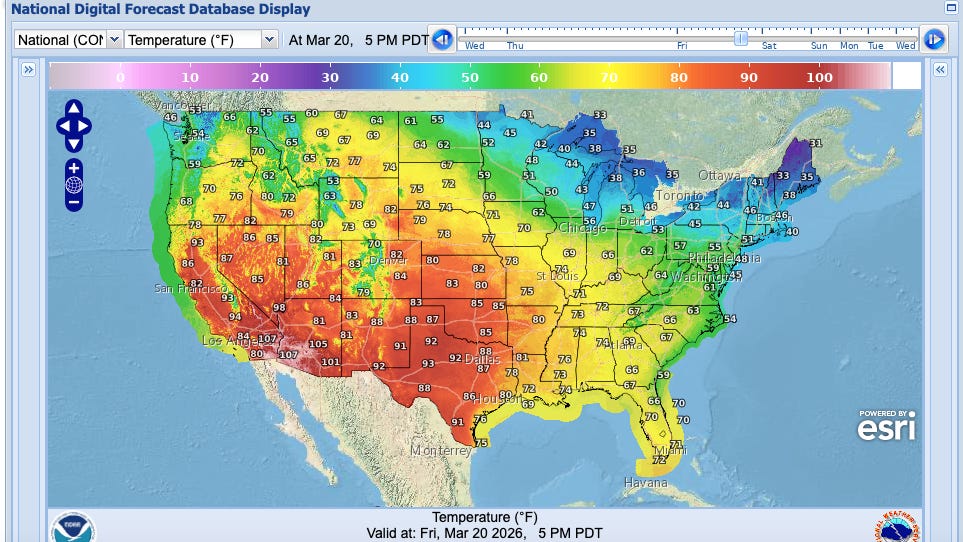 How Safe is Rain Barrel Water? When to Plant Warm Season Vegetables and Flowers.✨ | water safetyrain barrels+3 | Gail Pothour | Sacramento County Master GardenerRuth Stout gardening books | — | rain barrel waterwater safety+4 | — | 15m 17s | |
| 4/10/26 |  The 2026 Tomato Preview Show!✨ | tomato plantinggardening tips+3 | Don Shor | Redwood Barn Nursery | Davis, CA | tomato plantingsoil temperature+5 | — | 59m 04s | |
| 4/3/26 |  Growing Citrus Trees in a Non-Citrus Environment✨ | citrus cultivationhorticulture+3 | Lance Walheim | gardenbasics.substack.com | — | citrus treesgrowing tips+3 | — | 24m 36s | |
| 3/13/26 | 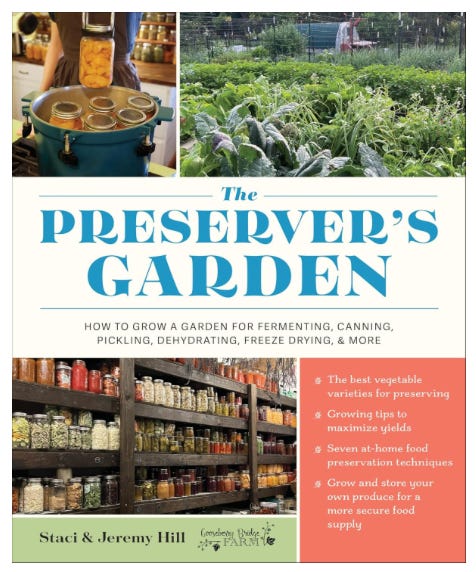 The Preserver's Garden✨ | sustainable farmingself-sufficiency+3 | Staci HillJeremy Hill | The Preserver's Garden | Gooseberry BridgeOzark Mountains | sustainable farmingfood preservation+3 | — | 30m 17s | |
| 2/27/26 |  What is Backyard Orchard Culture?✨ | Backyard Orchard Culturefruit varieties+3 | Ed Laivo | Dave Wilson NurseryFarmer Fred | — | backyard orchardfruit trees+3 | — | 10m 19s | |
| 2/20/26 |  Stock Tank Gardening✨ | stock tank gardeningcontainer gardening+3 | Gail Pothour | Fair Oaks Horticulture Center | Sacramento CountyCalifornia | stock tankgardening containers+5 | — | 7m 14s | |
| 2/6/26 | 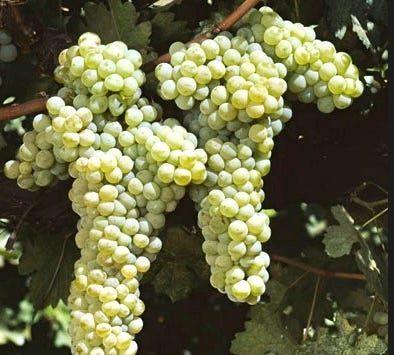 All About Grapes✨ | grape selectionplanting grapes+4 | Sacramento County UC Master Gardeners | Sacramento County UC Master GardenersBeyond the Garden Basics+1 | — | grapeswine grapes+5 | — | 10m 50s | |
| 1/30/26 |  First Food Garden? New Garden? We Have Tips. | Please share this with any of your friends or family embarking into the exciting world of backyard gardening, especially starting a food garden!America’s Favorite Retired College Horticultural Professor, Debbie Flower, and I explored these “lessons learned the hard way” (aka “Garden Wisdom”) back in 2022. This is a public episode. If you'd like to discuss this with other subscribers or get access to bonus episodes, visit gardenbasics.substack.com/subscribe | 18m 13s | ||||||
| 1/23/26 | 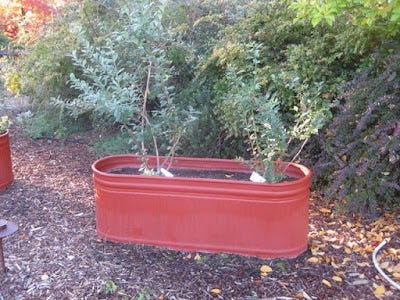 All About Blueberries | This is a free preview of a paid episode. To hear more, visit gardenbasics.substack.comBlueberries Grow Well in ContainersAt our former residence, the blueberry harvest from our six plants was outstanding; there was plenty for us, as well as the birds (note: add netting). The six southern highbush varieties that we planted there included Sharp Blue, Jubilee, South Moon, Blue Ray, Sunshine Blue and Misty. That was about 10 years ago. | 17m 46s | ||||||
| 1/16/26 | 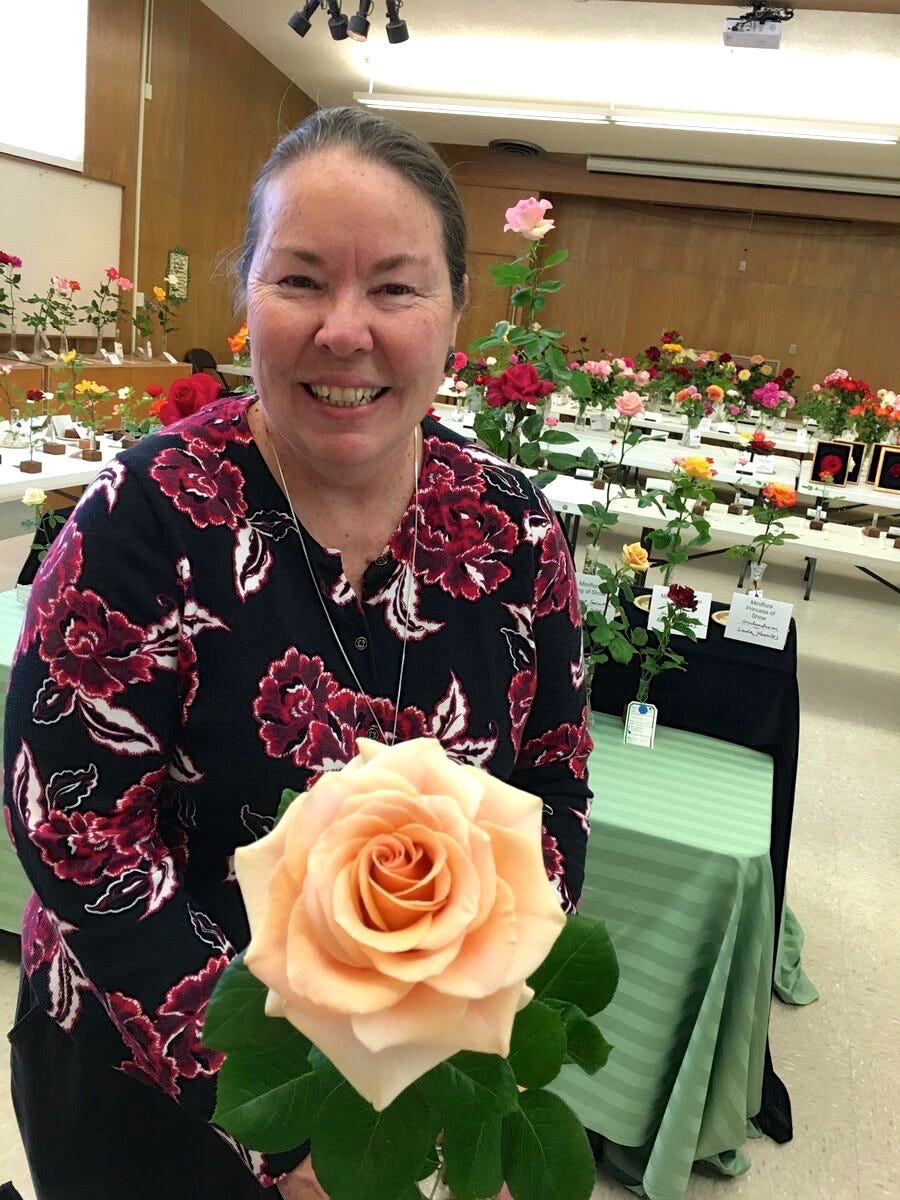 New Roses for 2026 | This is a free preview of a paid episode. To hear more, visit gardenbasics.substack.comIn today’s newsletter podcast, Master Rosarian Debbie Arrington waxes rhapsodic about the new rose varieties that will be at nurseries in 2026. In USDA Zone 9, those roses may already be available locally. If not, they’re usually available from rose catalogs. For paid subscribers, Debbie talks about 12 new rose varieties (it’s 6 varieties for free subscribers). Paid subscribers also have access here to the transcript of the podcast, which features pictures of all the roses as well as links to where you can find them online.After the paywall (in the middle of the transcript, below), there are pictures and chat about 6 more new roses for 2026; and, Debbie has tips for bringing cut roses into the house, preserving their aromatic nature. Plus, tips for what to look for when shopping for roses.Here’s the transcript of our conversation about 2026 roses with Debbie Arrington of the Sacramento Rose Society, along with pictures and links:==========Farmer Fred: I was looking up the term “shovel prune”, trying to find out its origin. If you’re a gardener, you may be familiar with the term shovel prune. It basically means to remove a plant, in a polite way. And the first time I heard it, it was from a rosarian. In fact, the only people I know who use the term shovel prune are rosarians. And so I figured, well, it must have some sort of rose background. But unfortunately, I hit too many dead ends. But I will just assume that shovel pruning is a Rosarian term, because you need to make room for all the new roses that are coming out right now. It’s a great habit to get into. (FREDNOTE: This article is not quite the dead end for a definition for “shovel pruning”… and it’s entertaining!)Rosarians love new roses. They love to try new roses. They love to smell them, as well. And one Rosarian has a nice bully pulpit here in the Sacramento area.Debbie Arrington is a master rosarian with the Sacramento Rose Society. She knows her roses. She and Kathy Morrison publish, every day of the year, the Sacramento Digs Gardening newsletter that’s sent to your email inbox, if you’re a subscriber (it’s free). There’s a lot of good information in that. Even if you don’t live in Sacramento, you could open a free subscription to the Sacramento Digs Gardening newsletter and get all sorts of good gardening information.For instance, in a recent newsletter, she talked about the new roses for 2026. This is similar to what automotive magazines publish for car enthusiasts every fall. Automotive fans love to see the new cars when they come out in the fall. Well, Rosarians are like that in January, which makes January the time for shovel pruning. Because you have to plant something else, something new, perhaps. So we’re going to find out what’s new for 2026. What has got the Rosarians a-flutter?Let’s sell some roses here. Debbie Arrington, have you purchased any of these roses that we’re going to talk about?Debbie Arrington: Not yet, but they are on my list. I have to figure out how much room I have to get some roses in. And you’re right about shovel pruning. It is the pruning of last resort when you’ve done everything you can to that rose and it still isn’t performing. It either has to move or has to go. And that’s how you do it, is you dig it out. As some Rosarians say, the way to make sure a rose has a better season is to just show it the shovel and somehow they’ll wake up and have a lot more growth that year.(FREDNOTE: perhaps a more genteel expression than “shovel pruning” when approaching an offending rose is “shovel ready”.)What happens is that over the years, a rosebush can lose its vitality and just start not performing as well as it should. And by losing its vitality, it atrophies. It gets less juice out to the end of its canes. It stops putting out new canes. And if it doesn’t put out new canes, then it will stop putting out roses. And a rosebush that doesn’t bloom is just a pile of thorns. So it’s time to move on to something else. And fortunately, there are still rose hybridizers and rose breeders and rose nurseries and people that are willing to grow new roses and introduce them. And the roses that we are getting now are brand new roses of 2026. We’re actually go back to 2016 or earlier when these roses were originally bred because it takes about 10 years for a rose to come to market after they first discover that seedling. So these roses have been in the works for a long time, but they all represent trends that have been going for most of this new century.Farmer Fred: What are the common threads on the popular new roses? What are rose growers looking for?Debbie Arrington: It’s like they say, everything old is new again. People want roses that smell like roses. They want roses that look like roses. And they want roses that have all those good traits, but in a very easy care format that doesn’t need spraying. In fact, doesn’t need much care at all. And roses naturally tend to be on the low water use side. You can get by with irrigation twice a month easily here in Sacramento, which is saying something for a water-wise plant. That’s the standard. If you can do that, then it’s drought tolerant. And these roses, the ones that are being introduced now, have very good foliage. It’s very clean, fungal-resistant, disease-resistant, and looking very pretty to frame those beautiful new blooms.Farmer Fred: You pointed out in the newsletter that some now are even self-cleaning blooms, that no deadheading is needed. I find that hard to believe.Debbie Arrington: But it works. And it’s particularly true of what they call the landscape roses and your low-growing ground cover or shrub roses. These plants just put out masses of blooms, hundreds of blooms at once. And to go through and deadhead that would be quite a chore to keep those going. So instead, what happens is the flowers die back to the little stem that holds it onto the end of the cane or where it comes out of the cane. And that just dries out, and then it just falls off. And it never forms any rose hips because of the way these flowers die back. And because they die back that way, it just drops off. And then a new bloom comes out of the next leaf, one down, from where that comes out. And so what ends up happening is these plants stay very short, under one foot tall, and they just keep putting on more and more blooms. So they’re just constantly covered with flowers. And they call them carpet roses because they form like a carpet of blooms along the ground.Farmer Fred: So these landscape or ground cover roses, these carpet roses. This sounds like a rose that would do well in just about any part of the United States.Debbie Arrington: Yes, it would. That’s part of their charm and their sell-ability is that they not only are very clean and easy care, but they’re also cold tolerant and heat tolerant. So they can do both extremes. A lot of these roses are hardy down to under 20 degrees, even colder. And then they also can tolerate temperatures in the 90 or over 100. So you’ve got this wide range of growing conditions and looking beautiful all through spring, summer, into fall.Farmer Fred: So landscape roses are basically the Toyota or the Honda of the rose world. But when new rose introductions come out, it’s like cars. These new roses are the sports cars. They’re the big SUVs. They are roses that stand out. It’s the Hummers of the rose world, if you will, that we’re going to be talking about. I don’t see any landscape roses on this list.Debbie Arrington: No because most of the landscape roses are sold by color and they’re a series of roses like one of the popular ones from Star roses is the Drift series and they form drifts of roses and they’re low growing carpet roses and they’re sold by color so there’s apricot Drift, pink Drift, yellow Drift, white Drift. Each one has a little bit of its own personality, like the apricot Drift, which I have, peach Drift and apricot Drift. The peach Drift has a much more ruffled flower to it, a semi-double, with about 12 petals. And the flower is small, about two inches across. But the plant is covered with just dozens and dozens of these blooms. So it just looks like this whole mound, you know, of roughly peach-like looking blooms, while the apricot one has a little bit more substance to the flower.RUFFLED ROMANCEFarmer Fred: Well, you said the magic word ruffled, and that is one of the roses that is included in the new rose introductions for 2026, Ruffled Romance. And this is a floribunda, and I guess we better define our terms here.Debbie Arrington: Yes, yes. Because there’s lots of rose terminology that tends to confuse people. But we’ll break it down the easy way. Most people, when you think of roses, you think of the roses like you get from the florist. And those are hybrid teas. And a hybrid tea rose, generally they have a formal look to them with a high point in the middle. And they look the way people imagine a dozen red roses to look. That sort of formal look. Floribunda, on the other hand, those are like a bouquet on a stem. Instead of one stem, one flower, you have bunches of flowers together on that one stem. And the name floribunda comes from the Latin for abundance of flowers. So that’s where floribunda comes from. Floribundas also tend to be shorter plants, most of them. And hybrid teas typically will grow bushes that are four and a half to five feet tall, while most floribundas stay under three feet. There are several exceptions to that, but they tend to be lower growing. And because they have a growth structure where the stems are shorter and the leaves are closer together, the distance between nodes where the leaves come out or the blooms come out is much shorter. You can prune floribundas with a hedge clipper.Because anywhere you cut them, it will be okay because there’s not much dieback on the stems. And they will produce lots and lots and lots of flowers. And floribundas also can grow in less space than a full-grown hybrid tea. So because of their shorter structure and less space requirements, they have become very popular with people with smaller gardens. And so floribundas are one of the areas where we’re seeing many more rose introductions, where in past years, oh, most of the new rose introductions that got people excited would be hybrid teas. Now, about half of them are floribundas.Farmer Fred: Well, I bet a lot of people are wondering now, since it’s such a compact plant, I bet it could grow in a container. Would that be true?Debbie Arrington: Oh, yes. They’re wonderful container roses, too.Farmer Fred: And what size container is best for a floribunda?Debbie Arrington: You want to have at least two square feet of space for the roots. Mostly you need space for the roots, more than anything. So I’d say at least a 12-inch pot is about as small as you could go with one of those. I have some in 12-inch containers and, oh, five-gallon pots. They grow well in. But if you put it in like a 10 or even a half wine barrel or something like that, they’ll be very happy forever.Farmer Fred: I would want happy roses, so I’d put them all in barrels. Ruffled Romance is from Jackson and Perkins. And it’s a yellow blend.Debbie Arrington: It’s a yellow blend, and it’s name is Ruffled Romance. It sounds like its name. It’s a very pretty, roughly yellow rose. It’s a golden yellow with little peach and pink accents on the edges of the bloom. It’s very cuppy looking. Instead of having a very pointed bloom, it has a very round, soft look to it. It’s extremely disease resistant and has a nice fragrance. The claim to fame on this is it’s the last rose that was created by the legendary hybridizer, Dr. Keith Zary. And he did hundreds and hundreds of roses, and this is the last one of his to come to market. And it’s being marketed by Jackson and Perkins, so that means it has a very wide footprint across the U.S., since they’re one of the major distributors as well as hybridizers.Farmer Fred: Good-sized flowers.Debbie Arrington: It’s nice flowers, too. They’re about four inches across, which is a good size for a floribunda. And when you consider that you’re having six to eight blooms all together on one stem, it does look like a bouquet on the stem.Farmer Fred: I noticed that a lot of the roses we’ll be talking about claim strong disease resistance. And out here, that’s sort of a secondary concern because of our low humidity. But back east and in the Midwest and down South, yeah, you want good disease resistance.Debbie Arrington: Oh, it’s huge. It’s huge. We’re spoiled in Sacramento in that we have ideal growing conditions for roses. As you said, that low humidity in the summer, that really helps. And also, when we hit 90 degrees, that kills most of the fungal diseases. So we don’t have the black spot and powdery mildew and rust that other parts of the country have. But places like Louisiana and Alabama and Mississippi or any place in the Midwest or on the eastern seaboard that has those high summer humidity, it’s almost impossible to grow nice roses without a lot of spraying because the plant just becomes overwhelmed with these fungal diseases. So the hybridizers have really been focusing on strong disease resistance so you don’t need to spray. Because that’s one of the things that gardeners want to cut out of their gardening is any spraying. Because besides killing the fungal disease, you kill a lot of beneficial insects and other things too. So having that disease resistance is very important.Farmer Fred: All right. So a lot of these will have disease resistance. And by the way, we’ll have pictures of all of these in the newsletter portion of the Beyond the Garden Basics. So if you’re wondering what they’re looking like, take a look at the newsletter, too, while you’re listening to the podcast.SEALED WITH A KISSFarmer Fred: A dark red hybrid tea rose from Jackson and Perkins is on the list for exciting new roses for 2026 called Sealed with a Kiss.Debbie Arrington: And this is the best true dark red rose out of the class of ’26. It is near black. It has that velvety look to it. And it looks like a classic hybrid tea exhibition rose. It’s the type of rose that rose exhibitors like myself gravitate towards because it has what they call presence, particularly on the exhibition table. It’s one of those roses that across the room, you see it and you go, “wow!”. And that’s the kind of rose this is. For people that have other roses in their garden, it has the color of, it’s a little darker than a Mr. Lincoln, but it has a much more formal form to it. Sort of like, Veterans Honor or Olympiad. Those both have very pointy form to them. But it has very, very dark red velvety blooms. And it’s one of those, it has very long stems too. So it puts out nice three foot stems. So it makes a nice cut rose.Farmer Fred: Is there such a thing as a black rose?Debbie Arrington: Not yet.Farmer Fred: All right. So for those of you planning a goth garden party, you may want to just settle for Sealed with a Kiss.Debbie Arrington: Yes, yes. Well, there’s roses that look very, very, very dark red, but they’re not true black. They haven’t reached that yet. They haven’t come up with a true black, and they haven’t come up with a true blue either.FLASH GORDONFarmer Fred: All right. Another floribunda that’s on the list of good roses for 2026. It’s a semi-double floribunda, and Debbie will explain the semi-double to us, Flash Gordon.Debbie Arrington: Flash Gordon has these big, bright pink blooms, and semi-double means it has about 12 to 16 petals. And how they came up with that is a single rose has six to eight petals. And so it looks, oh, It doesn’t look much like a rose. It has a very open look. Roses are, they’re related to apples and plums. So single roses tend to look like an apple blossom. And semi-double looks like, oh, more like a peach blossom, in that it has, you know, 12 to 16 petals instead. And the thing about Flash Gordon is it has really big golden stamens in the middle of the rose with a white eye around it. So it has this sort of flash, this chrome in the garden, where it looks sort of like, you know, look over here, you know, look at me. You know, it has this kind of flashiness that gardeners look for. But it also is something that pollinators look for. Because with those strong, stamens in the middle, it’s very bee-friendly. And it’s one of those roses that will bring a lot of bees into the garden.Farmer Fred: It is a form of a pink bloom, a cerise pink. I’m not sure who cerise pink is, but what is cerise pink?Debbie Arrington: Cerise pink is a certain color. It’s a very bright color. Oh, it’s almost hot pink.Farmer Fred: Okay. I’ll go with that.PENELOPE LIVELYFarmer Fred: You know, when I said that earlier that there weren’t any shrub roses on this list, this next one is. It’s a shrub rose. It’s a medium pink shrub rose called Penelope Lively.Debbie Arrington: Yes. Well, the Austin roses are all classified as shrub roses. And in this group of 12 new introductions that I put together, five of them are from the David Austin Rose Collection. And David Austin Roses, they originally started over in England. Their whole thing is to come up with roses that look like they could have been growing 200 years ago. They are really into Victorian-style roses. They’re great, big, giant cabbage roses. A typical hybrid tea rose has 25 to 40 petals. Most of the Austin roses have over 100 petals. And what happens is you’ve got a really big, fat, cabbage-style rose that’s huge, just huge on the plant, huge in the vase. Now, the thing that the problem with Austin roses that a lot of growers have is that the blooms are so heavy their necks break that if they get any rain on them, because they’re very cuppy style roses, they collect a lot of water inside the blooms,Their little neck breaks right over because it doesn’t have enough substance in the stem to hold on to that big giant bloom. So the Austin folks have been working really hard on creating stronger stems so their beauties stay upright during inclement weather. The reason people gravitate towards Austin Roses besides the beauty of the flowers is because they have very heavy, well-developed fragrance. They are renowned for this perfume that the Austin Roses put out. And part of the reason they have such a heavy perfume is that in roses, fragrance is tied to petals. The fragrance is not inside the stamens. It’s at the base of each petal is where the little fragrance gland is, or the plant structure that would be a gland. It’s where it emits its perfume, its scent. It’s just at the base of the petal. So the more petals you have in a rose, the more likely that rose is to have a strong scent. And so the Austin Roses, with their scores of petals, they have this very heavy fragrance in the garden. And it’s a sort of fragrance that you can smell it across the garden. It’s so strong. And that one bloom in a vase can scent a whole room.Farmer Fred: It is an interesting looking flower. It’s very complicated. It’s like looking at the June Taylor dancers from above.Debbie Arrington: And you were talking about Penelope Lively. And that is a medium pink, a middle pink shrub rose that Austin introduced. It is a name for a writer who’s very popular in England. And the rose was originally introduced in England in 2023. And now they have enough to share with us here in America. And so we’re getting it too. And it has 120 petals per bloom. And the Austin Roses that we get here in the U.S. were grown out in Texas instead of in England. When they originally started marketing Austin Roses to the U.S., they were growing them out in England. And the plants were pretty small and used to really cold weather, and then they’d come over here to sunny California and more than double in size. They just got gigantic. And they found that by growing them out in Texas, they could acclimate them a lot more to conditions that they’d find here in North America, and that they stay about the same size as what they say they’re going to grow instead of becoming crazy big monsters. But Penelope Lively is a classic Austin Rose. And as they say, it will be an instant classic.Farmer Fred: Now, you mentioned Texas as a growing ground. I’m very familiar with all the rose growing grounds in the southern San Joaquin Valley around Bakersfield and Wasco. Are there any other rose growing areas in the United States?Debbie Arrington: Well, the big ones right now are Wasco and in Texas. Wasco is here in California, down near Bakersfield. There used to be a lot of production down in San Diego County, but most of that is now homes or grapes.Farmer Fred: Oh, yeah.Debbie Arrington: Because the same conditions that, grapes like, roses like.Farmer Fred: Nothing in Arizona or Nevada?Debbie Arrington: Oh, yes, there are some. There’s a bunch in Arizona. And in fact, a lot of the landscape roses are coming out of Arizona.Farmer Fred: Okay. I would think so, just because of the sun, the heat, and the low humidity.Debbie Arrington: Oh, yeah. The thing about getting a rose to market is it has to be somewhere for about three years before they dig them up and sell them to the public. So that rose has been around for quite a while.QUEEN OF SWEDENFarmer Fred: All right. Queen of Sweden is next. That too is a David Austin rose, so I would imagine it has a good scent.Debbie Arrington: Yes, it does. And it is a very, very light pink, just a blush of a pink. You know, it’s one of those creamy white with just a little cast of baby pink. It has a heavy myrrh scent and 140 petals per bloom. You know, so it’s a beautiful rose. What’s interesting about it is it is a rose that they had originally introduced in 2004. And then decided to take it back and improve it and give it more stability, stronger stems, and more disease resistance, and then reintroduce it again. And so it’s the same rose, only improved.Farmer Fred: And it has, according to the literature with it, it has a heavy scent of m-y-r-r-h, a biblical spice if there ever was one.Debbie Arrington: Yes. What’s so interesting about it is myrrh is one of the scents that a rose can smell like. Roses can smell like more than 20 different things, including smelling like a rose. So myrrh is one of those different variations of what a rose can smell like. And it’s a heavy, spicy scent, like perfume.LARK ASCENDINGFarmer Fred: Next up is a rose, which to me is music. It’s the Lark Ascending. Which was a work by, I believe, by Ralph Vaughan Williams back in the 1880s or early 1900’s.Debbie Arrington: Yes, it is. A beautiful violin piece. And this rose, it is a lovely light golden color. Again, it has that myrrh scent mixed in with more traditional tea rose scent. What’s interesting about this rose is it puts out these huge flowers, but in big clusters. And the clusters, you know, have 10, 12 blooms on one stem. And so again, it’s a bouquet in a vase and very, very popular already. It’s one that people are talking about.Farmer Fred: But it’s not a floribunda.Debbie Arrington: Oh no, it’s classified as a shrub rose. The thing about the Austin roses is they are all classified as shrub roses because of the breeding history of the roses.Beyond The Garden Basics is a reader-supported publication. To receive the complete podcast/newsletter and support my work, consider becoming a paid subscriber. Thank you! | 26m 19s | ||||||
| 1/12/26 |  How to Protect Your Fruit Trees When a Frost or Freeze is Forecast | This is a free preview of a paid episode. To hear more, visit gardenbasics.substack.comWe are entering the shivering season for the Central Valley, Bay Area and low foothills of California, along with other mild winter states, especially those that grow citrus. Late November through mid-February is the most critical time here for protecting frost-susceptible plants.This is especially true for citrus tree owners, who are anxiously keeping an eye out on the upcoming weather f… | 5m 58s | ||||||
| 1/9/26 | 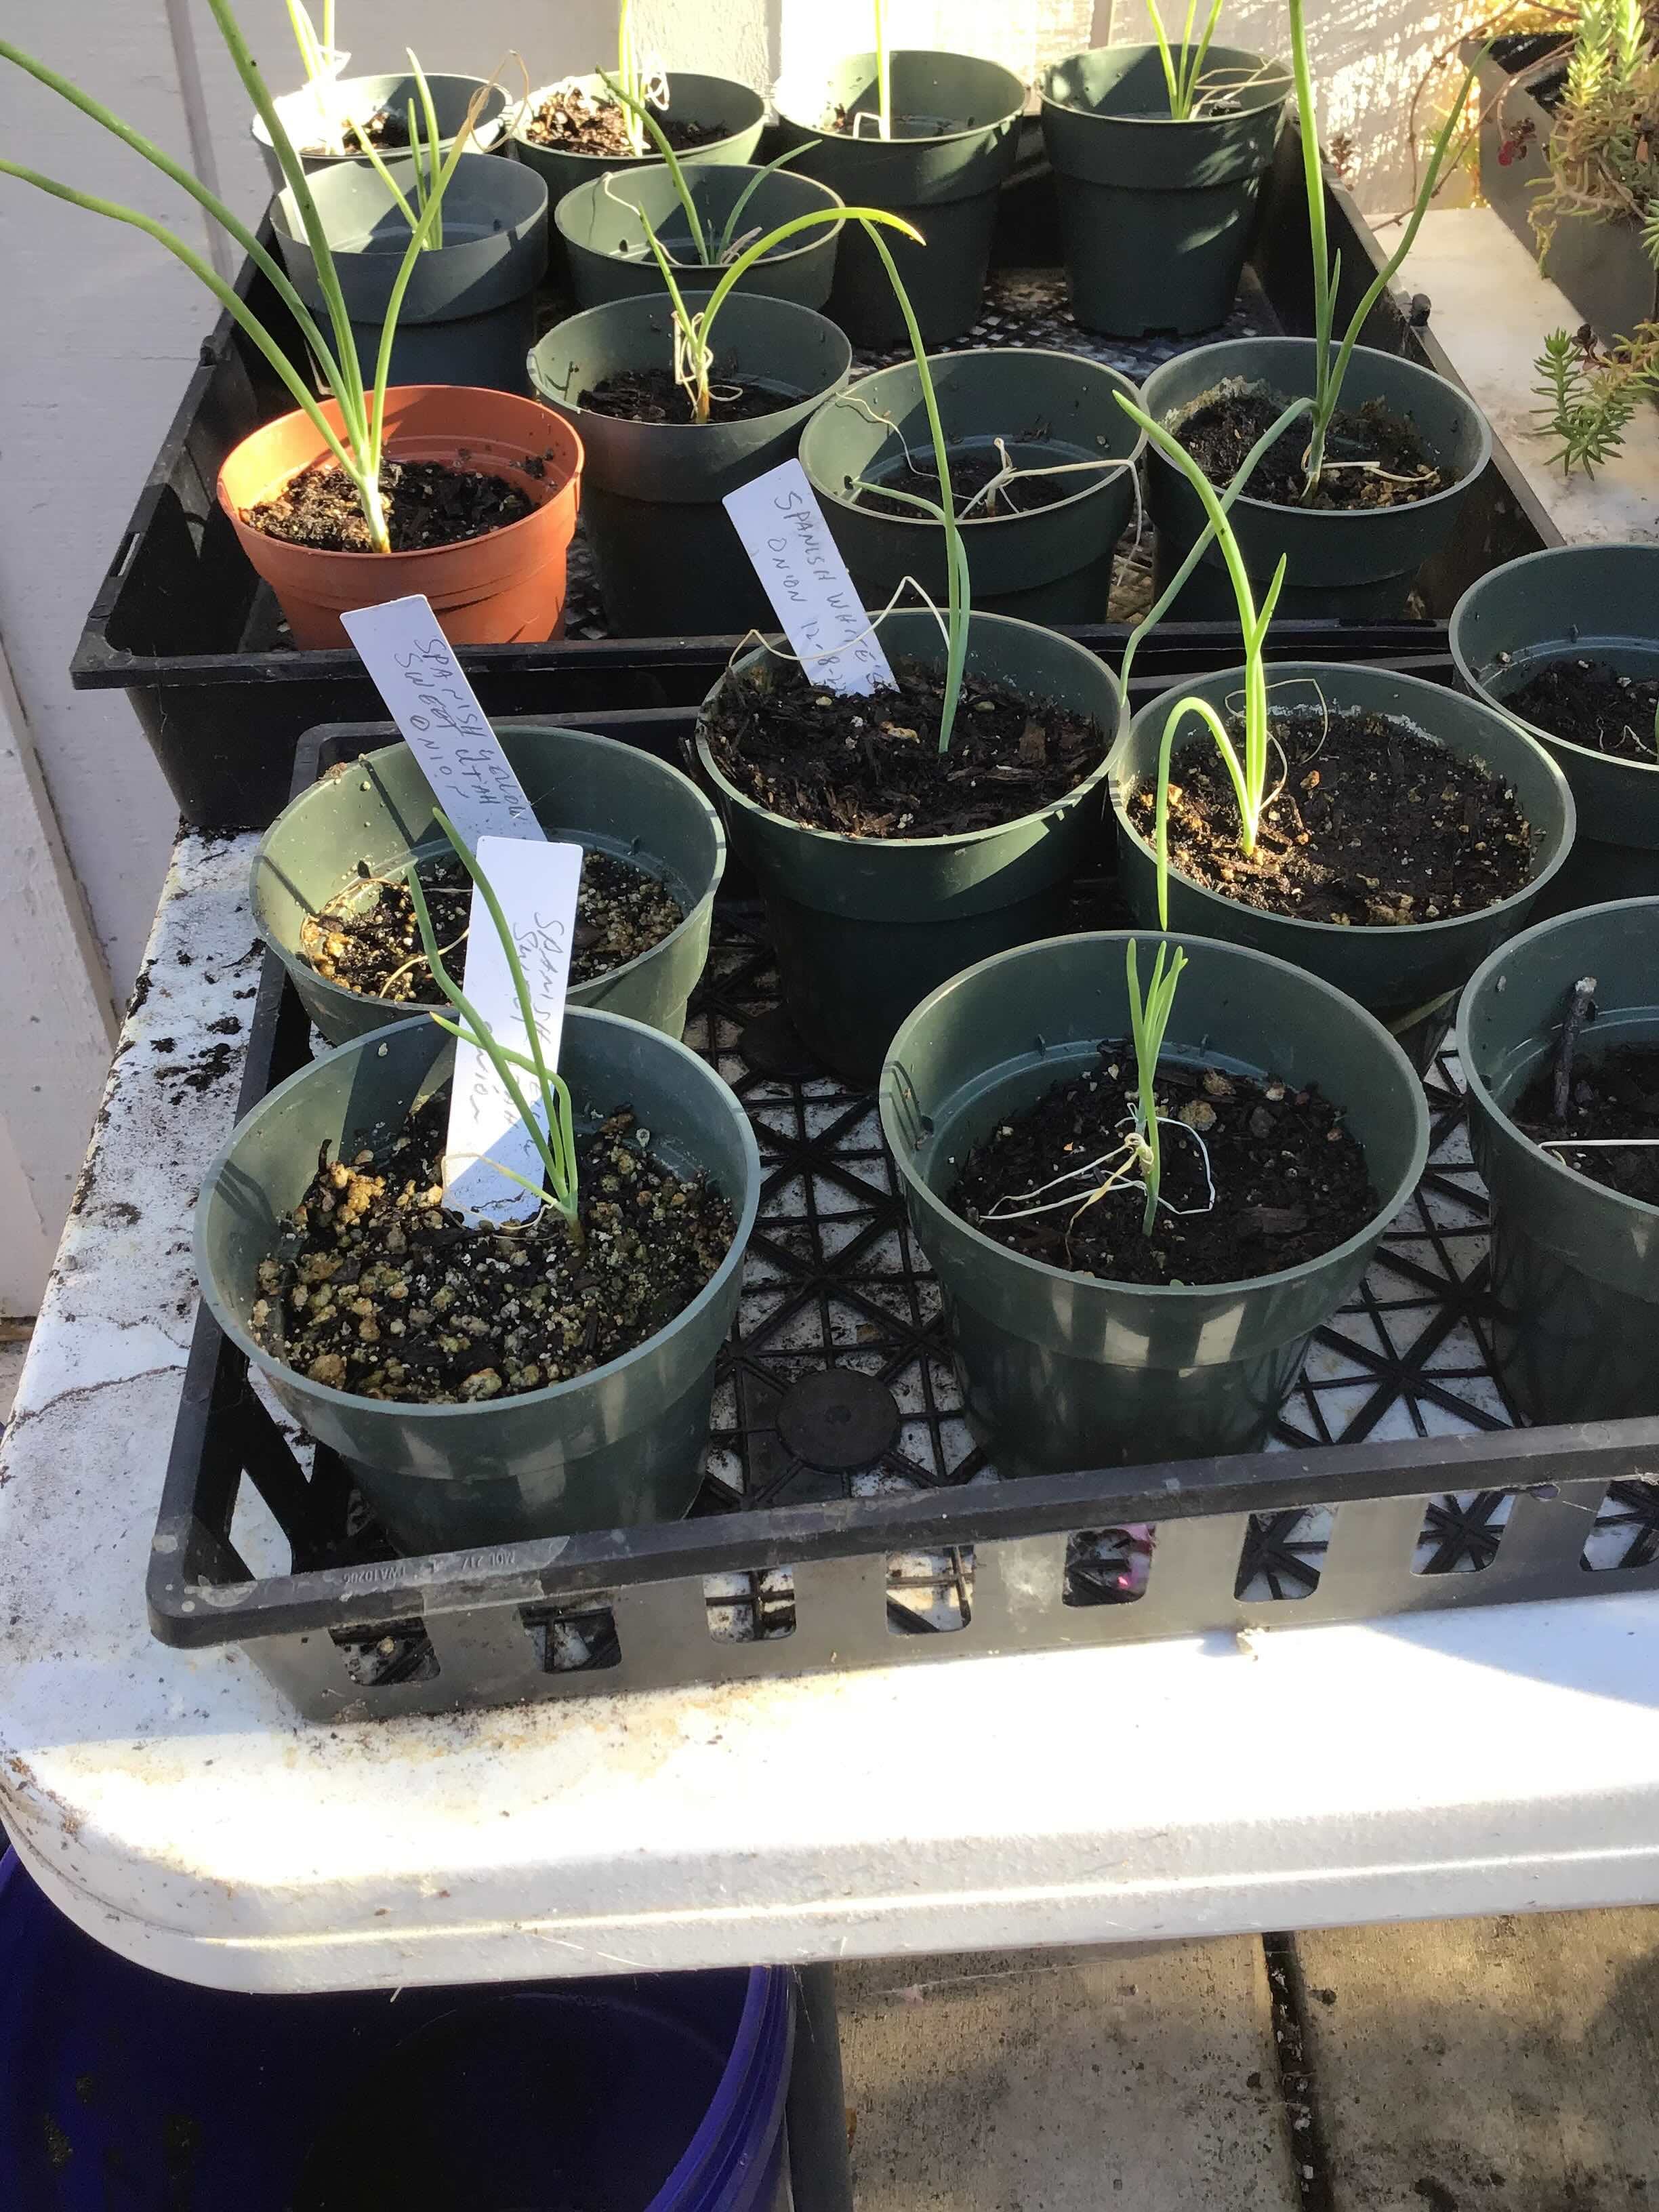 Onions Can Bring Tears to Your Eyes... | Growing onions can be confusing and try your patience, as listening to the above podcast will demonstrate. As our resident vegetable expert, Master Gardener Gail Pothour, knows first hand, growing green onions is a snap. But bulbing onions? Gail has more or less given up on trying to grow bulbing onions.If you listened to the podcast before you started reading this, it should be pointed out that the bulbing onion trial conducted at the Fair Oaks Horticulture Center more than 10 years ago that Gail mentions had some drawbacks, including starting from seed (which requires a lot of patience and the results can be widely variable), and, they were all started at the same time - in August - and not transplanted into the raised beds until November. That’s three months that it took for those onion seeds to produce seedlings to get to a transplantable size, about the thickness of a pencil. This is a public episode. If you'd like to discuss this with other subscribers or get access to bonus episodes, visit gardenbasics.substack.com/subscribe | 9m 37s | ||||||
| 1/5/26 | 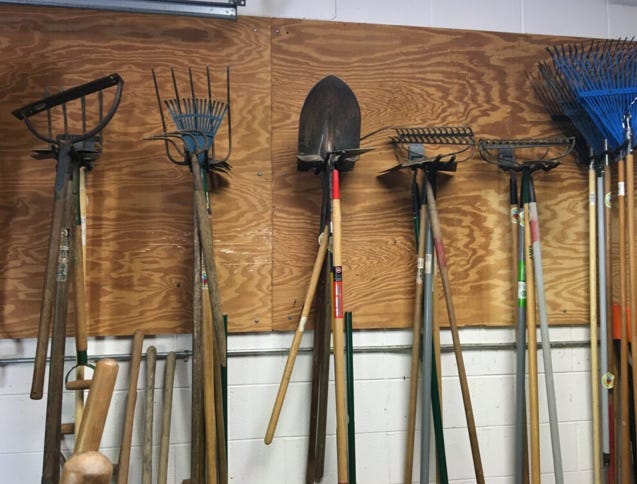 Tool Care Tips for Rainy Days (or Any Day) | This is a free preview of a paid episode. To hear more, visit gardenbasics.substack.comIf you spend good money on good-quality hand pruners that have replaceable parts, they can last for decades IF you take care of them: cleaning, oiling, and sharpening after every use. My Felco #2 hand pruners have been alive, well, and cutting since the 1990’s.So, how do you sharpen the blades of pruning tools? Sacramento County Master Gardener Bill Black offers step by step instructions in today’s newsletter podcast. His tips are available for all subscribers. And, he has a how-to-sharpen video.Also in today’s newsletter podcast (available for paid subscribers), Debbie Flower - America’s Favorite Retired College Horticulture Professor - and I do a deep dive into garden tool care and selection, including the must-have tools that should be part of every gardener’s arsenal for backyard fun. | 8m 45s | ||||||
| 1/2/26 | 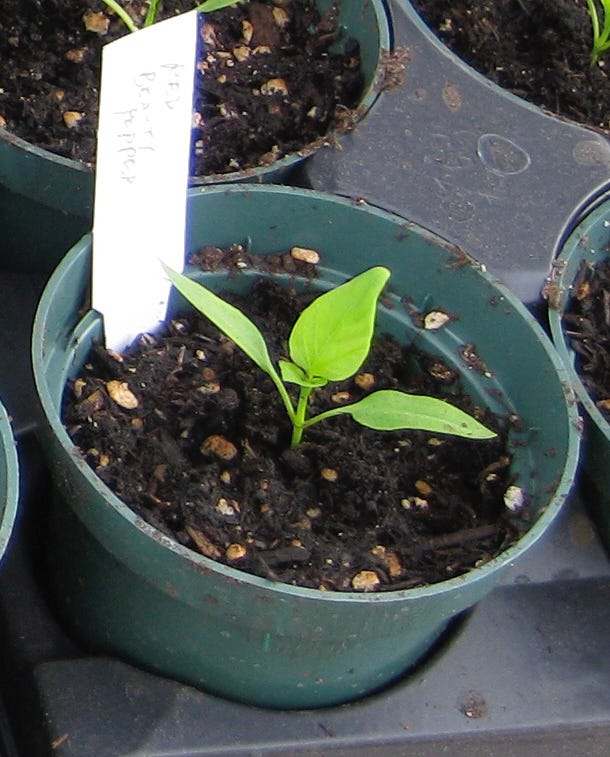 January is Seed Starting Time For Many Vegetables (Resending) | (Note: this post was sent early this morning, but only a few people received it. I’m not sure what the problem is at Substack, but I’m sending it again. Hope you get to read and listen to it!)Don’t give up on certain seed varieties that seem to really take their time, germinating and growing indoors. Among the warm season vegetables that are frustratingly slow to germinate are onions, peppers, parsley, basil, and dill. To make the wait even more maddening, it can take 8 to 12 weeks for certain vegetables to grow before they can be transplanted in the garden, including onions, parsley, eggplant and celery. Add to that the seeds of flowering plants that take awhile (8 to 12 weeks, or more) to germinate and grow to a transplantable size: snapdragons, begonias, vinca, lisianthus, strawflower, impatiens, statice, geraniums, petunias, rudbeckia and coleus.No wonder we talk about Seed Starting Tips in early January!In today’s newsletter podcast, America’s Favorite Retired College Horticulture Professor, Debbie Flower, offers five great hints on starting seeds of vegetables and flowers, including peppers:• How soaking pepper seeds in hydrogen peroxide can speed up germination; and, how seeds germinate. • Why seeds don’t need fertilizer.• How to know when to transplant those seedlings into larger containers. • Why seedlings need a light period and a dark period each day.• The importance of air movement and the development of reaction wood* for the young seedlings.Slow-to-germinate pepper seeds can take up to three weeks to show their first set of true leaves. And, several other vegetables, especially some herbs, take weeks to sprout. Among them are celery, parsley, rosemary, asparagus, lavender, artichoke, What you’ll need for successful seed germination and growth, according to Debbie:• Small, clean seed trays or containers with drain holes.• A soilless seed starting mix. (We offer up several homemade recipes, too)• The benefit of soaking pepper seeds for a few minutes in hydrogen peroxide.• Bottom heat via a propagation mat.• Consistent moisture.• Lights, once the seedlings appear.• Air movement.• Transplanting those seedlings into bigger containers once roots pop out of the bottom.Debbie Flower is a horticultural treasure. Just one listen to what she has to say isn’t enough. She is offering up so many great tips for gardeners in our “scenic bypasses”, that it really pays to either listen a couple of times or read the entire transcript (below, for paid subscribers). I am amazed at all I am learning from her; and, I’m listening to what she has to say at least four times (the original interview, two editing sessions, proofing the final) and polishing the transcript. And reading and editing that transcript, although last on the list, reveals more great gardening information that I had missed before.We also discussed the importance of gentle watering of seedling trays, so as not to dislodge the seeds (Debbie’s favorite is the Dramm 1000 shower nozzle). We have different ideas about the best sort of gentle watering equipment to use. A list and links of all the seed starting implements that we discussed, including watering equipment, is here**:Grow lightsDramm Water Breaker nozzlePump Pressure Water SprayerMulti Head hose-end sprayer with Mist settingSeed Starting trays, kitsIndoor GreenhousesOutdoor GreenhousesSeed Starting Mix* The phrase, “reaction wood”, awakens the thirteen year-old boy in me. I wonder how many giggling scientists it took to come up with the explanation of the importance of air movement in the development of reaction wood among young plants. According to this scholarly presentation, the answer would be: 10.** Most, if not all, of those germination product links lead to Amazon, mainly so you can see what they look like and a few details about them. I do not receive any remuneration from Amazon for these mentions or purchases (not allowed by Substack). Buy them from whoever you want. Shop around online or at actual stores. There are probably better prices out there than what the Amazon robots are showing you.Beyond The Garden Basics is a reader-supported publication. To receive complete posts, access to past newsletter editions, and help support my work, consider becoming a paid subscriber.GERMINATION REQUIREMENTS FOR VEGETABLE AND HERB SEEDSSource: Germination Requirements for Annuals and Vegetables (Iowa St. Univ.)(By the way, check out that site for a list of flower seed starting tips!)Germination Temperature (°F) : The ideal air temperature for germination.Light conditions during germination are critical for many annual flowers and vegetables. The seeds of some plant species require light for germination, and others require darkness.L = Require Light for Germination. After sowing these seeds, lightly press them into the germination medium, but do not cover them.D = Require Darkness for Germination. Cover the seed with the germination medium (usually 1/4 to 1/2 inch - precise depth outlined on the seed packet)L-D = Lightly Cover Seed. Do not place these seeds too deep in the soil. Lightly cover the seed, leaving the seeds as close to the soil surface as possible.Days to Germination: The number of days to expect the seed to germinate and emerge.Weeks Sowing to Planting: The number of weeks needed to get seedlings/transplants large enough to plant outside. Use this number to determine when to sow seeds indoors. If you intend to plant outdoors on May 15th, then the sowing date indoors would be the number of weeks listed in this column before May 15th.This planting calendar also can be applied to other USDA Zone 9 areas:TRANSCRIPT FOR TODAY’S INTERVIEW SEGMENTSVegetable Seed Germination Tips / Use Old Seeds? TRANSCRIPTFarmer Fred: Well here it is, the dead of winter. And you know what that means for us here in USDA zone nine. It’s pepper seeds starting time. Yay. It’s spring! It’s spring! We can start pepper seeds!Debbie Flower: I wouldn’t say it’s spring; but yes, we can start pepper seeds.Farmer Fred: Thank you for that. Debbie Flower: is here, our favorite retired college horticultural professor. And why is it necessary to start pepper seeds in January or February?Debbie Flower: They’re slow to germinate.Farmer Fred: Yeah, they’re slow to germinate and slow to get up to a transplantable size.Debbie Flower: Yes, like 12 weeks.Farmer Fred: Here in California, basically, it’s if you want tomato seeds to germinate and grow to a transplantable size, start the seeds near the end of February. They’ll be ready by the end of April. And I know in this day and age of climate change, you’re saying, “No, I’m planting mine the first week of March.”Debbie Flower: Then you got to start sooner. So nine weeks, I would say for tomato seeds.Farmer Fred: Yeah. And anything more than that, it’s going to get root bound. And it’s going to be jungle-like wherever you’re growing them, or terribly skinny. And you don’t want that either.Debbie Flower: Skinny unless you work that stem. Yeah, make it move.Farmer Fred: Well, we’re here to talk peppers, not tomatoes. We’ll talk tomatoes at a future time. Probably a month from now. But let’s talk peppers. I brought out my, as you can see here if you’re looking at the picture on this podcast on your phone, my pepper collection seed packets from last year. And obviously every year you don’t start the whole packet. There’s always some left, right. So these are from last year. They should be good this year.Debbie Flower: Yes. Seeds in general, if they’re kept dry and cool, should last two years, minimum.Farmer Fred: So, my favorites from last year that I grew were some heirloom pepper seeds from Baker Creek Heirloom Seed Company. And they included Blot, Jimmy Nardello, which is one of my favorite Italian style peppers.Debbie Flower: He’s got some friends you know, Jimmy.Farmer Fred: The Ozark Giant, Zulu ,and the one that lasted the longest. One that we harvested the last one two weeks before Christmas. The Nadapeno. With a name like “Nadapeno” you’re thinking well, it does looks like a jalapeno.Debbie Flower: Yeah.Farmer Fred: Nada. Okay, that’s the source of the name.Farmer Fred: It’s this jalapeno-like pepper that has no heat to it. And they’re very small. They’re maybe two inches long. But like I say, they lasted a long time, perfect for salads or stir fry.Debbie Flower: And that picture shows a young boy holding green pepper. No pepper is green forever.Farmer Fred: The Nadapenos did turn purple, in November. So there is that. Some of my other favorites that have done well for me either last year or the year before that include Big Red, which is a sweet pepper. All these by the way are sweet peppers. I’ve given up my hot pepper ways. My body objects.Debbie Flower: Yeah, I understand that.Farmer Fred: The tequila is one of my favorites sweet peppers. It’s a beautiful shiny purple. With just the best aroma of any sweet pepper I’ve ever cut into. The Tequila. It’s an all America selections winner, too. The Gypsy. I plant this every year, I probably have planted Gypsy sweet peppers for 20 or 30 years, because it has outstanding yield year after year after year. It starts off with sort of a pale yellow color, then it gets orange, red, and then very red. And it’s very sweet when ripe. But you can harvest it when it’s that pale yellow color. So it’s one of the earliest to start using from the garden, the Gypsy. The Giant Marconi is one of my other favorites, too, that I plant year after year. It gets fairly large. But like the name would imply, about eight inches long or so. And then of course I got to try something new. What’s it going to be this year, Fred? Well, from Southern Exposure Seed Exchange, I’m ordering something called the Super Shepherd sweet pepper. Okay. Don’t know anything about it. Yep. Gotta try it though. All right. And also be planting an old favorite of mine, it’s a sweet red pepper, the Corno de Toro. Which translated is the horn of the bull. It looks like a bull’s horn.Debbie Flower: Wow. You’ve sold those peppers really well.Farmer Fred: Thank you. And I don’t have to buy any... well, I did buy a few. But most of these seeds are from last year.Debbie Flower: Do you find that the peppers need a little more shading? Maybe just the fruit needs shading, more than a tomato plant?Farmer Fred: Here in California, especially here in the hot Central Valley, the west side of the peppers are developing sunburn. Yes.Debbie Flower: Yes, I’ve noticed that as well.Farmer Fred: And I’m now looking at areas that get some protection from that late afternoon sun. Yeah, but obviously pepper plants do best in full sun. And the definition of full sun is...Debbie Flower: Six to eight hours of unobstructed rays from the sun.Farmer Fred: Alright, six to eight hours. I think I have that in my yard now.Debbie Flower: Yeah, your neighbors removed some trees.Farmer Fred: Yeah, breaks my heart.Debbie Flower: I have friends who plant their peppers close together, maybe closer than it’s recommended on the packet. And this is when they go in the field, not when they’re starting from seeds. So that they shade each other to protect the fruit from that sunburn.Farmer Fred: Yeah, a lot of people make the mistake, especially on tomato plants, of cutting away foliage. And that can lead to sunburn of the tomato fruit.Debbie Flower: That’s in our climate. Now when I learned how to grow tomatoes in New Jersey when I was in college, way back when, they had us prune them to a single stem and tie them to a stake because they said we got earlier fruit set. And I have no proof of that. But that’s what I was told, that they needed to be exposed to the sun to ripen.Farmer Fred: So here are some instructions for starting pepper seeds, which is why you came here today. Because they take a long time to germinate. You got to kind of give them a little boost, a little tingle, a little something. And one of those little somethings is some bottom heat. Yeah. Yeah, very important. And that can be a propagation mat.Debbie Flower: Yes. Before I owned an official propagation mat, the heater for a water bed, basically the same thing.Farmer Fred: Yeah, that would work. At one wholesale nursery I know in the area, when they’re germinating seeds, they have tabletops, where they’re running hot water through pipes that are just below the surface of the table. And that provides just enough ambient heat to warm the soil to coax the seeds out of dormancy.Debbie Flower: Right. And if you’re growing in a greenhouse, the greenhouse does not need to be heated. If you’ve got the bottom heat on, under the plant under the soil.Farmer Fred: I did not know that.Debbie Flower: Yes, there are greenhouses that operate that way. You’re just trying to keep the plant warm, and it’s really just the soil mass.Farmer Fred: But after it germinates then you have to turn on the greenhouse heat, I would think.Debbie Flower: When it gets to a certain size, tall enough that it’s going to be out of that realm of heat that is being produced underneath it. So it depends on your source of heat. With the water, you probably get more heat than with a heating padFarmer Fred: Beyond the cotyledon stage.Debbie Flower: Yeah, probably after four true leaves.Farmer Fred: Cotyledons are not the true leaves. Those are the first two leaves that appear on any dicot .A dicot being a plant with two initial leaves.Debbie Flower: A monocot would only have one cotyledon. Yeah.Farmer Fred: Name an example of a monocot.Debbie Flower: Grasses are a monocot. Bamboo is a monocot. Yucca is a monocot. So is corn.Farmer Fred: Okay, but most of your fruiting vegetables are dicots. So anyway, you wait for true leaves to develop. And then if you do have a greenhouse situation, maybe keep the nighttime temperature at 50?Debbie Flower: At least. That would be a good baseline. 45 to 86 is the range in which all plants will grow. 50 would give you a measure of protection in case something went wrong.Farmer Fred: What sort of starting soil do you use? A seed starting mix?Debbie Flower: A seed starting mix is very a fine non soil mix, so soilless mix, that’s has some kind of organic component. peat moss is used, too. Sterile compost can be used. Coir can be used. they make peat pellets that you can use.Farmer Fred: Have had much luck with those, the peat pellets?Debbie Flower: One year, that’s all I used. And I did have good luck with it. But I don’t love their cost. They’re not cheap, right. And the cheaper ones have a net around them, which is nylon, and then you go back to the garden and you find all these little nylon nets all over the place. But they’re easy. They’re fun to watch, if you’re gardening with kids, and they have had seeds germinate in them, but I prefer to mix my own, which would be some very fine organic material as we discussed, and then something to open it up. The typical mix would include some perlite, perlite comes in different sizes, you want to get horticultural grade perlite, and it’s very lightweight so the seedling can push it out of the way. And then sometimes I use vermiculite which is the mica the rock, mica broken into small pieces and heated so it expands. And then that helps to hold moisture in the media also. I often put it on top of the seeds to make sure that moisture is trapped on the top surface of the soil. When you put on a heating mat, you can be surprised at how quickly it dries out. We often start seeds in very small containers. And so there’s not a lot of media. And then when you put that small container on a heating mat, they dry out surprisingly fast. And this vermiculite on the surface holds a little extra moisture again, it’s just sort of a reassures me that that it’s going to stay moist, even if I forget about it for a little bit too long.Farmer Fred: So on top of the soil mix that you created the seed starting mix, could you just place the seeds and then just top it with that eighth of an inch or so of vermiculite?Debbie Flower: Absolutely. The smaller the seed, the more chance it needs to be exposed to light in order to germinate. And vermiculite is very shiny. And you can even cover the seed completely with that eighth inch of vermiculite and the seed will get enough light that it will germinate. Now if the seed requires darkness, and I’m not aware of any vegetable seeds that require darkness, there’s probably some, but if they require darkness, you would need to bury that seed in order to give it that darkness.Farmer Fred: So I can stop poking my finger into the moist soil mix and dropping a seed in there.Debbie Flower:Right. you do want the seed to snuggle up to the media, kind of like in a fireplace. If you have two logs and they’re on either side of the fireplace, you’re not gonna have a very good fire, you’ll have a better fire when those logs snuggle up to each other. Okay, we’ll have a better germination when that seed snuggles up to that media because it will allow the seed to moisten faster.Farmer Fred: We’re learning a lt today, including how to build a fire. Okay, the soil mix. You can buy the seed starting mix. Yes, you can already mix that’s easy, but there are all sorts of formulas online for seed starting mixes and most of them contain basically what you talked about the three ingredients like peat, or coir, 1/3 of that, 1/3 of perlite. And I use 1/3 of a very fine compost as well.Debbie Flower: Right. You can use compost, you can use peat, perlite, vermiculite, sometimes depends on what you’re starting. With most vegetables, moisture is good for starting. And so doing peat, perlite and compost would be a good choice.Farmer Fred: All right, I’m waiting for the annual Debbie Flower: rant about planting in moist soil.Debbie Flower: The soil, and not everyone agrees with me on this, but the soil should be moist before it’s put into the container. If you’re starting seeds. Number one, the containers need to be extremely clean, no traces of media whatsoever in those containers. If you are concerned you don’t think you got it clean enough, you could run it through a 10% bleach solution. But bleach is quickly disabled by organic matter. Any diseases that you might worry about and in starting seeds, the disease is called damping off. Your primary problem will be carried over from the previous crop in that soil. So you want to make sure that the containers are brand new, or they’re older ones that have been completely cleaned. Then you mix your media or you get it from a bag and put it in a container. I use kitty litter containers, use a bucket, use a wheelbarrow, but the container itself needs to be clean. Again, you don’t want to transmit disease from a previous crop, put the media in there and moisten it just like a wrung out sponge not dripping. If you get it too wet, don’t worry too much, your container must have drain holes so that excess water will eventually drain out. Then put it in the pot and fill the pot to the very top, oh, even over the top, and then you bang it on the bench about three times. And that settles the media. Settles it enough, but not so much that you’ve pushed all the air pore holes out of that media. So the roots will still get oxygen. Then you plant your seed, and you always water after planting. And that helps do that snuggling of the seed against the media.Farmer Fred: If the container you’re using is a peat pot, and a lot of people use peat pots, do you need to soak that peat pot first?Debbie Flower: Yes, I believe typically they come with directions that they do need to be soaked. And often they go inside of a rigid plastic or ceramic pots.Farmer Fred: Really?Debbie Flower: Yeah. Okay. They don’t have to, especially if they have the netting, they don’t have to be.Farmer Fred: but most of your three inch or four inch peat pots look like they’re they’re fairly sturdy. Well, they are they’re dry. But as soon as they get wet, they start to fall apart.Debbie Flower: Yeah, that’s the problem.Farmer Fred: That’s why are peat pots. Right? They’re supposed to fall apart.Debbie Flower: We experimented with cow pots made from cow manure. And there were some other pots that we experimented with in production when I was teaching, and they didn’t hold up long enough for vegetable seedling production. At home, they’d probably work fine. But in a greenhouse situation, where we’re trying to move them around and take them out of the greenhouse for sale. They just didn’t stand up, they started to collapse. So they offer lots of different things for seed starting. There’s even a way to make seed pots out of newspaper, which would work but that newspaper is gonna break down fairly quickly.Farmer Fred: Very quickly. Yes. You mentioned damping off, right, let’s talk about that. It’s a very common disease for people who plant from seed You get your hopes up and overnight, your hopes are dashed.Debbie Flower: It’s literally overnight. And it’s, I believe, it’s a fungal disease, and it travels with water. And it loves the conditions for seed starting, which is warm and moist. One day you have your plants Some people start lots of plants in one container, maybe in a flat, and the plants will look great, and you’ll leave and you’ll come back the next day and a portion of them are laying down right at the soil level. And it’s because the disease has eaten that very fine stem all the way around it. It only likes very fine stems. So it only likes the seedling before it gets true leaves. Once the seedling has gotten true leaves, the stem is too thick for the disease to eat through it. But they lay over and they’re they’re dead. You can’t do anything about it.Farmer Fred: I guess technically a disease might dissolve and not eat. Or how does that work? When I think of eating, I think of insects chopping around it.Debbie Flower: Yeah, well, okay. Whatever method it, consumes the very young stem.Farmer Fred: Is damping off pythium? Or am I just making up a word there?Debbie Flower: No, I don’t think it is. I would have to check.Farmer Fred: I don’t know. I’ll check, too...Debbie Flower: Yeah, it’s a fungus. Rhizoctonia and fusarium. Along with water mold pythium. Oh no, you’re right. So it’s a group of fungi.Farmer Fred: It’s a fungal club. All right. I like to use plastic pots over and over again, three inch plastic pots three inches wide, maybe four inches tall. Mm hmm. And I clean them thoroughly. Thank you. Then I always fear that, “Oh, what if this open package of seeds that I’ve had for a year went bad?” Well, I’ll stick three seeds into each container, hoping one comes up. Of course all three germinate.Debbie Flower: That’s very common.Farmer Fred: But by the time they put out their first true sets of leaves, I will be transplanting each one into its own three inch pot. And that means there’s usually a big tray of pepper plants I’m offering for free out on the front porch every April or so.Debbie Flower: Yes, the seedlings quickly take over space. So be prepared for that.Farmer Fred: Yeah, that’s the beauty of having a greenhouse. This is a good scenic bypass to go on, because what if you don’t have a greenhouse?Debbie Flower: you can start them indoors, there are some aids to germination that you will want for any seedling. One is you want to be near a window, it does help to have light. Plants are amazing. Even house plants know when it’s winter and when it’s not. So it does help to have some stimulation from outdoor light. But you will need stronger light than that. So to get a good strong seedling, you need extra light. It used to be fluorescent lights hanging within inches, literally two, three inches above the plant. Now there are LED lights that can be used for the same thing at home. Those are your options. And the reason you don’t want to use sodium halide or halogen or something like that is they are too hot. They give off too much heat and they would burn the plant. You have to have very strong lights, you have to have the light near the plant. And the amount of heat coming from those other types of lights that might be used in a commercial production situation would not work indoors in your home.Farmer Fred: There are some interesting light structures out there that you could be using to get your seedlings to grow. And we should point out that you only need to turn those lights on when the plant has actually emerged from the ground. And all of a sudden it wants more light. And most of these lighting systems are usually long, narrow tubes. And you wonder, “well, how the heck can that provide enough light?” I guess one of the keys is, it’s only two inches from the top of the plant, right? But they’re usually on flexible hoses if you will, and you can bend it down. And they come in different colors.Debbie Flower: Yes, they do. Lights come in what we call the warm tones, which would be the reds, yellows, orange; and the cool tones, which are the blues. And those two different parts of the spectrum have different jobs in the plant. And so you want two bulbs and you want one cool and one warm. I was looking at a seed catalog the other night and they had structures for starting seeds. It was just a two foot long fluorescent or it could have been LED fixture that holds two bulbs. One warm, one cool, it’s on metal stand and you can raise and lower it. And that’s important to be able to raise and lower it. So the ones Fred was describing we’re on a gooseneck that can move around and the one I saw in the seed catalog would was attached to the side structure, and could be moved up and down, because the plants are going to grow. And you want to keep the bulbs within a couple of inches of the tops of the plants for best growth. That’s one thing you definitely need, is additional light.Farmer Fred: You can find some interesting little mini indoor greenhouses available at some of the big box stores and in the better nurseries that look like a little pup tent that have trays in them, a stand and a light fixture. Mm hmm. And it has like a white cover to it, a white sheet cover to it. And I guess that is for maintaining the heat inside.Debbie Flower: Okay, I haven’t seen those.Farmer Fred: you need to get out and shop around.Debbie Flower: I have trouble understanding the need for the plastic part, the structure part. I assume it’s to increase moisture. But there are problems with getting the moisture too high, then you can start having fungal diseases and your plants can rot. The other thing that I would recommend that you have for seed starting is wind, a fan. So because you want the stem of the plant to be strong, and in order for the stem to be strong, it has to move, it has to develop what’s called, reaction wood. It’s called that whether the plant is woody or not. And you want it to sway back and forth. The experiment was done on plants on a bench by some graduate students, and they had to go into the greenhouse and shake the bench for 10 minutes a day. That’s all it needed. That 10 minutes strengthen the stem. I use an oscillating fan, meaning one that goes back and forth. And I have it on a minimum of a half an hour, so that all the plants that it goes back and forth past will get their own 10 minutes of shaking and that will strengthen the stem of the plant.Farmer Fred: Half hour once a day.Debbie Flower: Half hour once a day. Yeah,Farmer Fred: Also you can find these at just about any nursery or big box store, are seed starting kits that consist of a catch basin if you will, an insert that might have up to 72 cells in it and a high plastic lid.Debbie Flower: The domes are wonderful. Yeah, I use domes. I have a greenhouse but I use domes. The domes have openings on either side and along the top so that you can control airflow. Seedlings do need airflow, you do want them. You don’t want them to get so wet that they just rot in place. Seeds will rot in place if they get too wet. You do want some airflow to get them to germinate and then once they are above ground you take the dome off and start using the wind.Farmer Fred: There are also, and this is important, because one question you have to ask yourself, where’s the water going to go? Yeah, it has to go somewhere. It can’t be sitting in the soil. And usually plant trays are ribbed so that the plant cells are sitting maybe half inch or so above the bottom. That just means you have to be vigilant though about emptying out the bottom of that tray. Right?Debbie Flower: It’s like watering a house plant. You don’t want it to sit in a tray of water,Farmer Fred: And there are some kits you can buy that have everything you need all in one fell swoop, you’ve got the dome, you’ve got the cells, you’ve got the tray and you’ve got the heatmat below. That’s a great way to get started. How long can they stay in those little cells though?Debbie Flower: Well, I’m trying to think from germination, it might be a week or two depends on what you’re growing, depends on how big it is. If it’s a bean seed, you got to get it out of there really fast. You’ll start seeing roots coming out the bottom of the cells, and that’s definitely a time to take them out. They’re small, and when you have to increase your frequency in watering, you know, you’ve got a lot of roots in there. So those are the two clues.Farmer Fred: Okay, you’re right. And that’s the other thing, too, is they may not need water every day, but you should check it every day. Absolutely. And some cells may be more prone to drying out than others.Debbie Flower: Yes. Sometimes the edges dry out first, especially if the dome is older. And I do use them for more than one year and it doesn’t quite fit, or part of it, I tried to always put too many pots on the heat pad. And so some of them are getting more heat than others. And so they’re drying out sooner. So they’re getting sun, if they’re in the greenhouse, some parts of the container, are getting sun, more sun than others, there are a variety of things that will cause different sections to dry out first. So yes, check them and periodically pick up the insert and check for roots coming out the bottom.Farmer Fred: And if you use a plastic dome, make sure that has vents on top that you can open.Debbie Flower: Right. And make sure you do open some of them.Farmer Fred: The question that people who listen to Garden Basics might ask, “why can’t you just go to the nursery and buy the plants?” Well, you could, if you wanted to. But don’t you like something a little different, right? Maybe if you want something that’s heirloom or has a different texture, or look or color, much more available in seed than they are as plants. If you go to a good nursery, and check all the varieties of sweet pepper plants, for example, they might have 10, maybe 15 when there is, in reality, if you look at a seed catalog, there’s pages and pages and pages, of possibilities for you to plant. That’s the next level for gardening is...Debbie Flower: explore.Farmer Fred: Thank you, yes.Debbie Flower: It’s fun, it’s rewarding. If you’ve got kids, they often get a kick out of, “look at that, it just came up!” Especially if they put the seed in the soil. So it can be really a cool thing to watch happen. And once you’ve invested in the seed starting set, they’re under 50 bucks, the whole set with the heating pad and the tray and the cells and the dome, then it can be cheaper, because you get a lot more seeds for what you would pay for a single plant at the nursery. And you can reuse it. If some of your plants didn’t come up or you choose not to grow them. You can take the plant out and reuse some of the media for other uses, not for seed starting, but for other uses.Farmer Fred: The nursery industry, they love for you to come in and buy those six packs or those four packs or those singles in the four inch pots of annuals and vegetables because they’re making twice what they paid for it.Debbie Flower: Yeah, it’s profit. But business deserves to make a profit. But you’re right, it does. They do make money.Farmer Fred: It’s a high profit item for the nursery. Now the problem is, of course, if you’re growing them from seed, you’re gonna have more than you know what to do with.Debbie Flower: Right, so you can make some really good friends. Yes, exactly.Farmer Fred: Do a plant swap.Debbie Flower: There you go. Yeah, yeah, you buy the peppers and someone else buys the tomatoes.Now one thing we didn’t discuss was goosing those little seed peppers. Like we said, they take a long time to germinate. And it can be frustrating. I taught students how to do this stuff and you want them to be successful. You want them to see the baby plant as soon as possible. One thing that we did, I read it somewhere, and we tried it and it did help. And that was to soak the seeds in hydrogen peroxide. Hydrogen peroxide, its chemical makeup is H202. So it’s additional oxygen to water. So it’s got more oxygen, and that for some reason, seems to help the seed germinate. In order for a seed to germinate, it has to absorb moisture. There’s a full sized baby plant in there and a source of food for that baby plant inside the seed. And so that absorbed moisture activates chemicals, which cause the cells to start to expand. The first thing that will come out of a seed is a root. And then after that, the cotyledons, which are the source of food and the full baby plant will expand. But for peppers, it just takes a long time. But soaking them in hydrogen peroxide helps. So then you say, “well, how long?” If you check the references, they vary from seconds to half hour. When we did it when I was teaching, we did it for 10 minutes. I can remember the students walking around, with their little plastic cup of pepper seeds, watching the clock and talking to each other, which is fine. It varies. I’ve also seen it recommended for chili pepper seeds, which are pepper seeds. Same thing. The amount of time varies depending on what reference you look at. But it’s worth a try. You could do an experiment, plant some seeds without soaking, then plant some seeds with soaking. Make sure you put that on the label and then see who comes up first.Farmer Fred: And what is the difference in the studies that you’ve done on this of germination time between and unsoaked pepper seed and soaked pepper seeds?Debbie Flower: Well, I don’t have that in my head immediately, but I want to say one week for soaked pepper seed.Farmer Fred: Wow, that’s quick.Debbie Flower: Yeah, that is quick.Farmer Fred: Yeah, because pepper seeds are notoriously slow. Yeah, don’t give up after two weeks. It could be take a third week.Debbie Flower: Yeah. And these were in a greenhouse with a dome, on bottom heat, tended daily. They were well looked-after seedlings.Farmer Fred: And not fertilized. We should point out that at this point in their life, they don’t need extra fertilization, correct?Debbie Flower: They don’t they have those cotyledons, and that’s specifically to feed the baby plant. Once they’re up out of the ground. It’s a different story. But just to get them to germinate, they’ve got all the food they need. The other thing though to consider is don’t plant them too deeply. They are living off of that cotyledon food. From the time they get wet, until they emerge and get sunlight. If they run out of that cotyledon food before they make it up to the surface and out into the sun, they’re dead. So if you plant the seedling too deep, it will die before it makes it to the surface. It’ll germinate but it’ll die before it makes it to the surface. So we were talking about using vermiculite on the surface and not putting the seed in very deeply. That may be a choice that is beneficial for getting those peppers up.Farmer Fred: And again, the process was place the seeds on top of that moistened soil mix in the container, bang that container once on the table top and then sprinkle on like an eighth of an inch or so of vermiculite.Debbie Flower: And then water very gently. Watering is a skill that I found I had to train the students to do because the tendency is to put the planted tray of seedlings or pot of seedlings right under the faucet and water it, and out of the pot goes this seed, because it is right there on the surface. So you need to use a very gentle flow. We used Dramm brand nozzles, they make some with many many many holes in them, 300 holes, 500 holes, and I had the students turn on the water, stand back feet away from the table where the flat of seedlings or planted seeds were, and turn it upside down so the water went up in the air and then it came down. It’s frustrating because it doesn’t wet the media as fast as they may have liked. They also make fogging nozzles to water seedlings with, they’re even more frustrating because they produce very little water. But you put the media in wet, you’ve put the seed on the wet media, you put the wet vermiculite over the top, you’re just trying to get everything settled with a little bit of water. You do not want the water to be very hard on the surface and wash the seed right out of the container.Farmer Fred: Dramm refers to that utensil as their “water breaker nozzle.”Debbie Flower: Water breaker nozzle. Okay. Yeah, that’s the thing on the end. Yeah.Farmer Fred: Showerhead nozzle, water breaker nozzle. If you just have your typical multi-headed hose end sprayer with various settings, I would do it on mist.Debbie Flower: Yes, there you go. Very good. And that would work.Farmer Fred: the whole idea is not to dislodge the seed. Great.Debbie Flower: All right, just be aware of that when you water.Farmer Fred: Anything else.Debbie Flower: The only other thing I could think of is people will say how long do I leave the lights on when the plant is up out of the ground? It’s anywhere from eight to 12 hours a day.Farmer Fred: Is that all? Would you do it during the day or at night?Debbie Flower: During the day. Plants need night. They do other things at night. During the day, they’re doing photosynthesis and they’re respiring which is the opposite of photosynthesis. Photosynthesis is making food. Respiring (at night) is taking that food, breaking it down to make new cells or fix damage or whatever the plant needs. If they never get nighttime, they can’t do that and they’ll burn themselves out.Farmer Fred: All right. Like you were mentioning, this is the perfect sort of homeschooling type of thing to do with the kids to show them how seeds germinate. But if you want a wide variety of different, cool looking, great tasting vegetables this year get seeds. We’re starting off the season with peppers. Go ahead, buy some seeds and get started. Debbie Flower: , thanks so much for getting us going on the 2022 vegetable garden.Debbie Flower: Always a pleasure. Thanks, Fred.=======================CAN YOU PLANT OLD SEEDS?Farmer Fred: We’re talking to our favorite retired college horticultural Professor, Debbie Flower: . And Debbie, this question comes in and I bet this question is on the minds of a lot of gardeners, both new gardeners and experienced gardeners. Cheryl writes in and says, “I still have half a packet of tomato seeds left from last year. Are they are they still good?” Well, I guess we can go with our standard answer. ‘It depends’, right?Debbie Flower: Right. It depends what we need to know, seeds can last several years. Typically, I maybe will keep them for two years. But the critical thing is how they were stored in that time that you’re saving them, they need to be kept dry and cool. And the smaller the seed, the shorter life it has, the less chance that it’s going to survive for this year. And so, if she wants to check it, to see if it’s going to germinate, the easiest thing to do is take five or 10 seeds. Hold on, I’m gonna sneeze. Okay. Now, of course, it’s not gonna come.Farmer Fred: Well, it will in mid sentence.Debbie Flower: Right. She wants to check her seeds. To find out if they’re going to germinate. The easiest thing to do is to take a paper towel or a coffee filter, but I use a paper towel folded in half, and then open it up again and take 10 seeds because then the math is easy. Typically, there are lots of seeds in a seed packet. So 10 is good. You’re not going to run out of seeds by using 10. But you could do five, the math is just a little harder. Put them in, right in that fold. Separate them by an inch and fold the paper towel back over them. And then roll it up in the other direction like a cigar so that the seeds are all in the fold and they are all at the one end of the cigar and then dampen the whole thing. And then I like to stand it up in a jar or coffee cup, glass something like that and put a plastic bag over the top so it stays moist. And I look at the package how many days until germination, tomatoes probably seven to 14. And so I would check it in a week by taking off the plastic bag taking out the paper towel unrolling the cigar opening the fold and see how many have germinated. That will give you an idea of how many will germinate in the ground. If half of them have germinated. Then I might want to double seed. Put two seeds wherever I would start one and then hopefully I’ll get one to germinate. If none of germinated after seven days I fold the thing back up again. Roll it up like a cigar again, put it in the jar again. cover it with plastic again, leave it another week and check it again. If none germinate then then probably the seeds aren’t very good. I wouldn’t trust them and I would buy new.Farmer Fred: Inquiring minds want to know... Why stand the paper towel up? Why can’t you just lay it flat, that wet paper towel?Debbie Flower: Because it’s easier to see which seeds have roots. If you lay it flat, roots grow towards gravity. And so if you lay it flat, the roots will just grow wide all over the other seeds and it’s difficult to tell from which seed the root has arisen. If you stand it up in the cup, then the roots grow down and when you open it up, you’ll be able to see which ones have germinated and which ones have not.Farmer Fred: There’s some downsides to doing this test in January for tomato seeds. I’ll explain that in a second. But let’s say you’re doing this test in February or March, could you take those seeds that have germinated and then put them in some sort of seed starting mix?Debbie Flower: Yes, you could. And that’s why I mentioned a coffee filter instead of a paper towel. The downside of a paper towel is that it has fibers and the roots can become entwined in the fibers. And so if I did this experiment with a paper towel, I would cut the paper towel around the seed and plant the whole thing, paper towel and all, because the root hairs tend to get into the paper towel, if you do it on a coffee filter, they’re less likely to do that. But coffee filters don’t give you as much space as a paper towel does to do this test.Farmer Fred: And why use a seed starting mix instead of just backyard soil?Debbie Flower: Seeds are small, if we’re growing in a container, backyard soil holds too much water to be in a container, it’s very tight in its texture, and water stays in the soil on the surfaces of all the particles. And if the particles are very close together, which is what I mean by tight, then the water fills all the pores between the soil particles and there’s no place for oxygen. Roots do need oxygen to grow. So a seed starting mix is more open, it actually has bigger particle sizes, or there’s lots of different fields soil. And some of the reason field soil can be tight is because the particle sizes are of all different sizes. And so the little ones fit in between the big ones, the seed starting mix that you purchase is of all one size. And so they’re all big, and so when think of a jar full of golf balls, and how there would be spaces between them. But if you added pennies to the golf ball jar, all the spaces would be filled with pennies. So the golf ball and the pennies is this field soil. The golf ball alone is the seed starting mix. Seeds are small, and the little plants that come out of them and seeds contain a completely formed little plant. The little plants that come out of them aren’t very strong. And so the particle sizes need to be very lightweight, so that the little plant that comes out of the seed can push that particles out of the way. Field soil tends to be heavier, it can have rocks in it. Other kinds of potting material that you would buy in a bag to grow things and in containers can have particle sizes that are too large and baby plants can’t push their way out. And if they can’t push their way out, they can’t get bigger. So we use seed starting mix for those reasons.Farmer Fred: Ah yes, that mysterious big wall of soil that you’ll find at a garden center or big box store: potting mix, planting mix, outdoor mix, container mix, and somewhere there you will find, usually small bags of seed starting mix. I guess that’s fine if you’re only starting a few seeds. But if you’re starting a lot, you may want to economize by perhaps making your own seed starting mix.Debbie Flower: That’s true. That’s very true. And so for that we typically use peat moss, perlite and vermiculite on a one to one to one mix. Meaning if I have one, I’ll use an empty a clean, empty container, maybe a four inch, maybe a gallon depends how much material I’m trying to make. And so one part means one container full of peat moss. Another part means one container full of perlite and another part means one container full of vermiculite then you need to add a little bit of lime to that because peat moss is very acidic. If you don’t want to use peat moss, you could use sand that would be for very well drained things, native California drought tolerant plants, cactus, things that like drought, you could use coir. And apparently it comes in pellets. I have not used the pellets, but the pellets need to be soaked, but they work better than the big blocks that are all compressed because the big blocks have to be soaked before you use them. But coir is coconut fiber, you could use compost or any sort of organic material that is clean and seed free can be used to as the instead of peat moss.Farmer Fred: And if you do use coir the benefit to that is it has more of a neutral pH unlike peat moss, which is very acidic. So you wouldn’t need the lime in that case.Debbie Flower: Yes. And the math to calculate how much lime you need. It’s not easy. Yeah,Farmer Fred: So all of a sudden that bag of seed starting mix looks better and better.Debbie Flower: It sure does.Yeah.Farmer Fred: But it’s amazing. What you can do on a big scale though if you just got in my case I would use peat moss, I would use compost and I would use perlite. Now I know you’re not a big fan of perlite but you have a substitute for the perlite.Debbie Flower: I wouldn’t use the perlite in seed starting because it is lightweight. And I’m not a fan of it because of the amount of dust it creates. It creates dust whenever you’re using it so when you open the bag, there’s a puff of dust in your face and then when you dig into the bag to get some out there’s dust and when you pour it there’s dust and when you mix it with the other stuff, there’s dust. So the number one thing to do when you’re working with perlite is wet it. Open the bag with scissors rather than pulling it apart. The scissors are calmer and cutting the bag you create less dust that way. Take the hose and put it right in the bag and wet the perlite. Then, of course, we all have masks these days. Wearing a mask is a good idea. When I’m potting on up once the seed has germinated and I have a small plant with a roots system then I will switch to pumice. Pumice is created by volcanoes. And it comes in different sizes. You can get small sizes that are no I haven’t found one that’s as small as regular horticultural perlite, I haven’t had trouble with it creating problems because it’s a little bit bigger. So I will use that as the component in in container mix.Farmer Fred: One of the problems with perlite as well is as it goes on in the growing process of that new plant. It tends to float up to the surface.Debbie Flower: Well, it doesn’t float to the surface, but everything else washes away.Farmer Fred: Okay, Everything else goes down.Debbie Flower: Everything else goes down. Yeah.Farmer Fred: All right. And is that just cosmetic though?Debbie Flower: Yes, that is cosmetic.Farmer Fred: And if you don’t want to use perlite, you could use pumice.Debbie Flower: You can replace perlite with sand in seed starting. It needs to be horticultural sand, which is also builders sand, which is washed and sized. Because sand typically comes from places that where saltwater has been my I know, you know, you can drive around the US and find gravel pits and sand pits, mining pits all over the place. But they’re in places where salt water used to be and so the sand is full of salt. And so that salt needs to be washed out. Salt will kill a plant very very quickly. It’s it’s got sodium in it, and too much sodium will quickly kill a plant. So the sandy would use in place of perlite and seed starting mix needs to be washed and sized and builder sand is sufficient for that that that you can get at your big box store.Farmer Fred: You don’t want to start tomato seeds in January because they’re going to be ready to transplant in probably eight weeks. And if you do that in January and think you’re going to transplant in March, you just might be in for a rude surprise if the weather turns cold. So if you want to back-time your tomato seed planting, subtract eight weeks. So if you normally plant in late April, you would want to plant those tomato seeds in late February. So I guess this little test, your seed experiment, would work with just about any vegetable seed, wouldn’t it?Debbie Flower: Yes, I used to do it with my students a whole classroom I kept old seeds, some of them decades old, a bean in particular and Anasazi bean that germinated every year, almost 100% for decades. So some seeds can be kept a long time and some seeds can’t. But yeah, every semester we did I did that test with students. It was to me a very wonderful way of testing your seeds.Farmer Fred: What is the best way to store seeds? I know you said in a cool dry place. Is the refrigerator an option?Debbie Flower: Yes, the refrigerator is an option. And that’s where I keep my seeds. Most of them, not all of them. But just because I’m lazy not because I have any selection of ones that shouldn’t go in the refrigerator. refrigerators are typically around 42 degrees. And that’s okay for all seeds.Farmer Fred: And how would you store them? Could you store them in their original container that you purchase the seeds in?Debbie Flower: I always want to do that because there’s so much great information on that seed packet. And I won’t remember what they are, if I take them out and I collect those little dehydration packets that come in do things. I’m sure you’ve bought a new purse recently, right Fred. And then the bottom of the purse is a packet says do not eat. And it’s typically white with some writing on it and rub it around in your hands. And you can feel that there are round things inside. And that’s for absorbing moisture. And I collect those and I’ll put those in with my seeds to keep them dry, and can put them in a Ziploc bag or a jar is even better.Farmer Fred: And then put them down in like the vegetable or the fruit crisper.Debbie Flower: I don’t put them there but anywhere would work. The fruit crisper sometimes is controlled to be humid. And that’s not what you want. You just want it to be cool and dry. So back in the jar in the back of a shelf or even sometimes have them in the door.Farmer Fred: Is there any danger of losing the life out of those seeds if you store them in the refrigerator if there are apples in the same location?Debbie Flower: Apples give off ethylene gas and ethylene is a ripening hormone. I don’t think it would affect the seed. I would have to, honestly, look into that. But I would want my seed in a jar or in a plastic bag. And that should be enough to keep the ethylene away.Farmer Fred: So before you rush out to buy new seed, maybe gather up those packets that you stored in a cool dry location, test the seeds and you just might have plenty for the upcoming growing season. Once again, we learn a lot with Debbie Flower: . Debbie, thanks for a few minutes of your time.Debbie Flower: Always a pleasure, Fred. Thank you.Fred Hoffman is also a University of California Cooperative Extension Master Gardener in Sacramento County. And he likes to ride his bike(s). This is a public episode. If you'd like to discuss this with other subscribers or get access to bonus episodes, visit gardenbasics.substack.com/subscribe | 46m 51s | ||||||
Showing 25 of 181
Sponsor Intelligence
Sign in to see which brands sponsor this podcast, their ad offers, and promo codes.
Chart Positions
9 placements across 8 markets.
Chart Positions
9 placements across 8 markets.